|
We pose our kids all the time
during a typical
photo shoot. Why not let them have fun
at the shoot and get some great
"posed" candid shots! You can even use
these great shots as a silhouette in
your layouts for a funky contemporary
look. Try making a layout reminiscent of
the Apple iPodô commercials
with crazy dancing silhouettes!
Making silhouettes
is easy by using the Extract filter in
Adobe Photoshop.
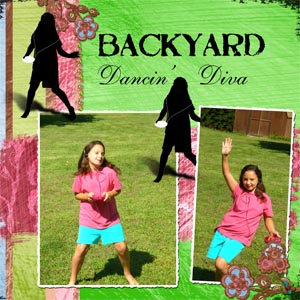 Backyard
Dancin' Diva - I used
a silhouette of my daughter with
her CD player as a fun accent on this page. Made with Boho Funk Page Pak download papers and elements. Backyard
Dancin' Diva - I used
a silhouette of my daughter with
her CD player as a fun accent on this page. Made with Boho Funk Page Pak download papers and elements.To create a
silhouette, set
up the shot so that there are
few distracting elements and
colors in the background. If
you're using an image you
already have, don't worry, we
can handle a complex background,
it just may take a little more
finesse.
For this layout, Backyard
Dancin' Diva, I asked my
daughter (who was more than
willing) to go into the yard
and dance around with her CD
player. I was sure she was in a
place where the lawn was all
around her in the photo. |
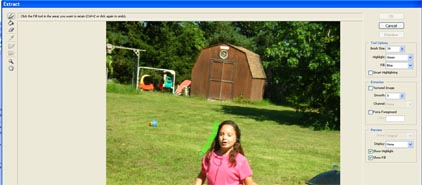 In
Adobe Photoshop, I used the
Extract Filter to select my
daughter out of the photo. This
is done by using the brush to
draw an outline around the
subject. Use various sized
brushes - smaller brush for more
detailed areas and a large brush
for less detailed areas and be
sure to zoom in to get the best
outline. Once you have the
outline drawn, you can fill it
in with the bucket tool and
click ok. In
Adobe Photoshop, I used the
Extract Filter to select my
daughter out of the photo. This
is done by using the brush to
draw an outline around the
subject. Use various sized
brushes - smaller brush for more
detailed areas and a large brush
for less detailed areas and be
sure to zoom in to get the best
outline. Once you have the
outline drawn, you can fill it
in with the bucket tool and
click ok. |
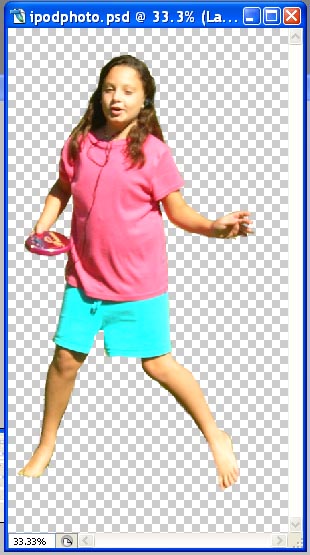 |
What you had outlined and filled in
is now a separate element and
can be easily moved or altered.
Using the subject simply as is
would make a great subject in a layout.
Perhaps she could be poking out
of a frame for a
fun effect. To make the shape black,. I select the cut-out
image by clicking control and
the layer and then filling with
black (Edit>Fill>Color>Black)
I then selected the CD player
and filled with white, then drew the cords going to her
ears with a brush. (for viewability below, I added a
green background layer)
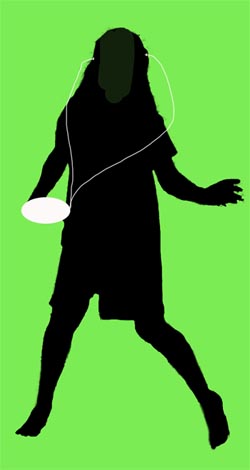
|
|
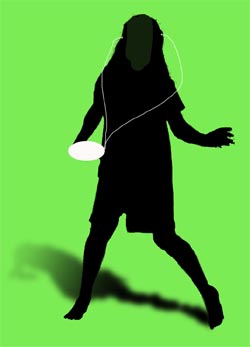 |
To complete the look, I added a
custom shadow. This was done by
duplicating the silhouette layer
and transforming it with the
Transform tool set to
Perspective. I then filled it
with a gradient so that it would
gradually vanish. You can find
more information on how to
create similar silhouettes at
these online sites:
Photoshop Lab
Photoshop Madness
Graphic-Design.com |
Doris Castle,
CottageArts.net
|


