|
Creating a Torn
Edge on your
Digital Paper using

(Adobe« Photoshop« , Jasc Paint Shop
Pro, Corel« PHOTO-PAINT,
Ulead PhotoImpact 7 and higher would follow similar
instructions)
|
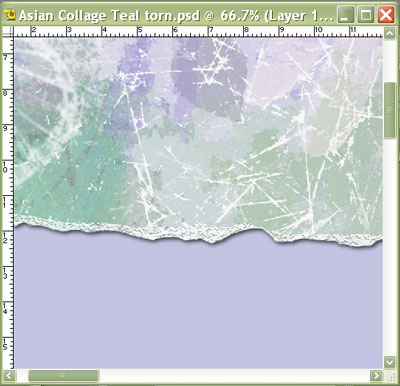
There are numerous ways to
create a Ĺtornĺ edge. This
is just one method to create
this look at the right using
Adobe Photoshop Elements. To see
our tutorial on this technique
using Microsoft Digital Image
Pro
click here .
What youĺll need:
Youĺll learn how to:
-
Use the Lasso tool
-
Use Layers
-
Use the Move Tool
-
Use the Eraser Tool
-
Add a Drop Shadow
|
 |
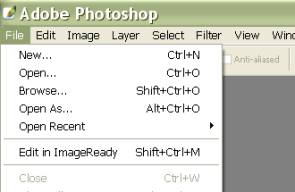
Open Adobe Photoshop or Photoshop Elements.
Open your Photo.
Choose File > Open
and browse your system for photo.
Click photo of choice and then choose
Open.
|
|
|
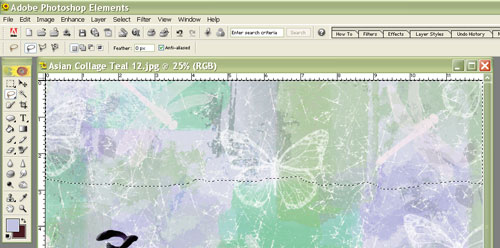
Select the Lasso
 Tool
from the Toolbox. Tool
from the Toolbox.
Draw a freehand shape
around the area of the background paper that you want to
use in your layout. |
  |
|
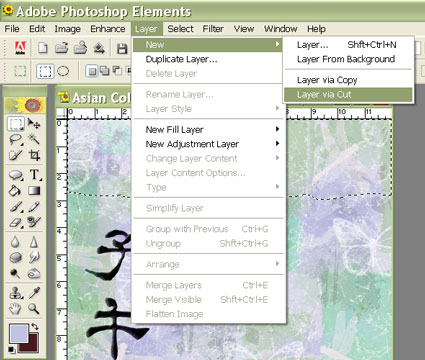
Now, we are going to put
that selection on a new Layer.
Choose Layer > New > Layer via Cut.
|
 |
|
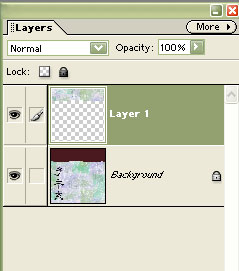
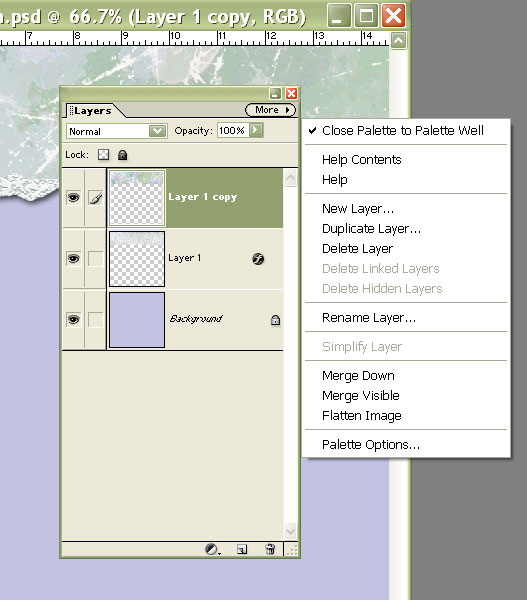
The Layer Palette should
look similar to this.
The part of the paper we
are going to Ĺtearĺ should be on its own layer.
|
  |
|
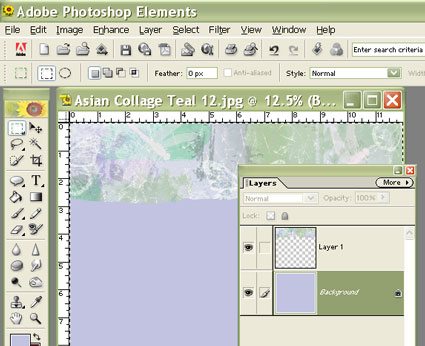
Now, we need to do
something with the Background layer. You can either
paste in another paper, or make it a solid color, as
shown here. Hereĺs how:
Click on the Background
Layer in the Layers Palette to make it active.
Use the Eyedropper
 Tool
to select a color from your image, by clicking on the
image. Tool
to select a color from your image, by clicking on the
image.
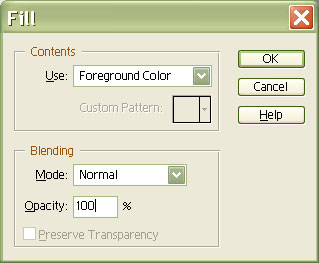
Choose Select > All.
Choose Edit > Fill.
Make sure Foreground Color is selected, and
click OK.
|

 |
Now, to make the
Ĺtearĺ look a little more realistic, we are going to use
Layers.
Make sure the top
Ĺtornĺ layer is selected.
Choose Layer >
Duplicate Layer.
Now, click on the
middle layer to make it active, as shown at the right. |
 |
|
Select the Move
Tool
 from
the toolbox. from
the toolbox.
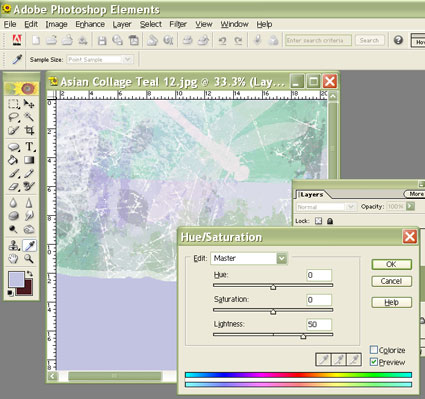
Use the down
arrow on your keyboard to nudge the layer
downward, one pixel at a time. (Try 5 or 6 pixels).
Then choose
Enhance > Adjust Color > Hue/Saturation. Increase
the Lightness by 50.
(You will only see
the edge of the middle layer lighten.) |
  |
|
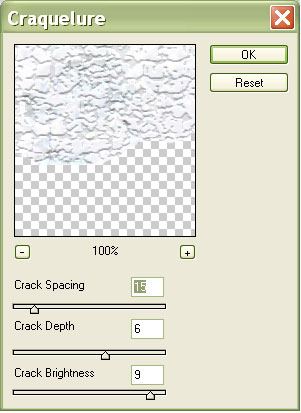
To apply some texture to
the torn area,
choose Filter > Texture > Craquelure.
Experiment with the
settings until you get the desired amount of texture.
Click OK. |
|
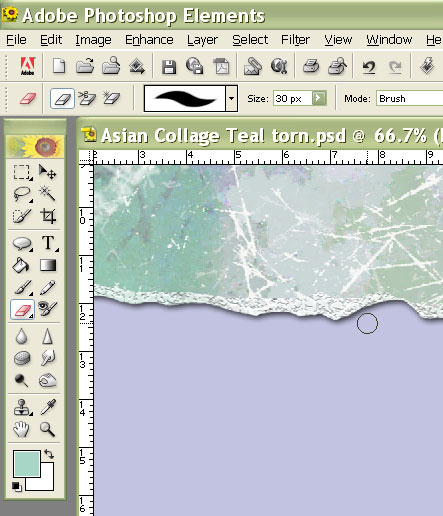
With the middle layer still active,
select the Eraser tool
 . .
On the Options
Bar, make sure you have the default options selected, as
shown at the right. |
 |
With the Eraser, draw along the edge
of the paper to make the Ĺtornĺ part more irregular.
|
 |
To combine the two torn layers
together, make the top layer active.
On the Layers Palette,
click on the MORE button, and choose Merge
Down.
|
   |
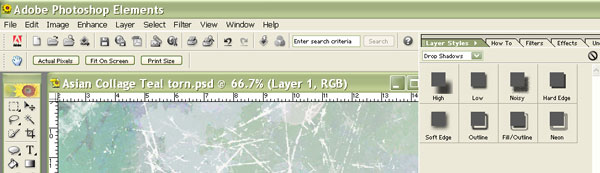
Now, you can add a drop
Shadow to your torn edge by choosing the Layer Styles
Tab in the Palette Well.
Choose Drop Shadows
from the pull down menu, and select a drop shadow for
your tear. Soft Edge works nicely.
|
 |
Youĺre finished!
Now be sure to save your file.
|
|
Written by Roseanne Miske.
Copyright CottageArts.net,
All Rights Reserved
|

