Newsletter Cover  ~  Building Blocks  ~  Digital Tips  ~  Free Download  ~ Idea Corner  ~  Design Team Layouts ~  Shop


How do you make a subject of a photo POP out of the photo?

One of the advantages of scrapbooking digitally is being able to use an image editor in creative ways to create effects that would be quite difficult with paper supplies.

In the layout, Easter 2006 (left), you can see that I made it appear as if my daughter's head is actually coming out of the frame. This adds a playful spirit to the page, while adding to the sense of depth.

To achieve this effect, choose a suitable photo.
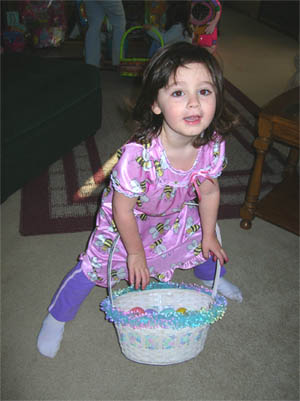
At right you can see the original photo...I decided that I wanted her head to extend out from the top of a frame.

Open your background paper (I colorized the flower paper from the Growth Spurts Paper Pak to coordinate with the pink in my daughter's nightgown).

Choose your frame and drag onto the layout. Add your photo to the page.

Image editors offer a wide assortment of tools to use for this technique, and I will use the Eraser Tool to erase part of the background of the photo.


Place the frame over the photo and position where desired. In this example I have the frame across her forehead. With your Rectangular Marquee Tool, select the portions of the photo that overhang the edges of the frame on the sides that you will not have anything extending from. Select Edit>Cut for each selection to remove. In this example I will delete the  left, right and bottom.

Duplicate this photo layer.

With the duplicated copy layer, place it above the frame layer and make the lower photo layer invisible for now.

Select the Eraser Tool. Adjust the brush setting to a Soft Round brush (I used 40 pixels). Adjust the size and softness to your needs.

With the Eraser tool, erase around the part of your subject that will be extending outward on the top photo layer. Also erase where the frame is.

Make the lower photo layer visible, and it looks as if she is peeking right out of the frame!


On the lower photo layer you will have to use your Rectangular Marquee Tool, once again, to erase the part of the photo that should not extend on the other three sides (if needed).

Merge or group your photo and frame layers together for convenience, as you continue on to create your layout and embellish.

Have fun!

1


2004 - 2007 (C) CottageArts.net, LLC - All Rights Reserved


1