Hi everyone…Beth here…time is buzzing by and summer busyness has kept us away from the blog for a bit!
Today we’re going to talk more about drop shadows. You can see Michelle’s latest tutorial on creating realistic drop shadows here
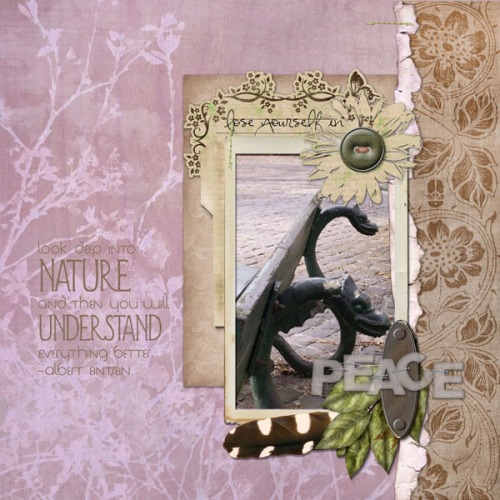
Supplies: Peaceful Moments PakA common mistake when creating digital layouts is mixing the direction of drop shadows on various elements. Whenever you are done with a page, take a look at it as a whole and see if it looks “off.” If so, check to make sure all the shadows are in the same location on the elements.
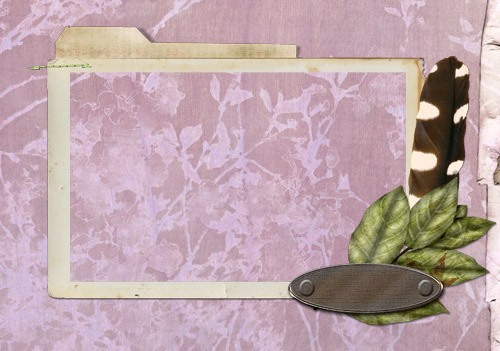
Most elements in our digital kits come without a drop shadow so you can add your own shadow in the desired angle, depth, and opacity. However, on some layered elements, clustered frames, and elements that deserve a special effect, we often will include a custom shadow (like shown on the frame cluster above – see the lifted shadow on the tab at the top). Our custom shadows are almost always at 120 degrees with the light source coming from the top left.
Always take a good look at an element by zooming in to determine whether it already has a shadow or not. In the past few years, we have added the word shadow in the name of an element that includes a custom drop shadow.
If the element does have a shadow and you want to rotate the element in another direction (as in the frame below), here are some simple steps to help make sure your shadow stays at the BOTTOM RIGHT, leaving the light source coming from TOP LEFT (which seems to be the norm).
If an element is horizontal and you want it to be vertical, almost every photo editing software program has the ability to rotate objects. Sometimes rotating at 90 degrees is all it takes, but what if the element is a cluster of objects or just looks strange at this angle. Hmmmm, what to do? Flip it. Some programs call this mirror, others call it flip – but the result is the same.
The tricky part is knowing which way to flip. The direction depends whether your element starts out vertical or horizontal or whether you rotate clockwise or counter clockwise. Just remember you want the the end result of the shadows to be the BOTTOM RIGHT.
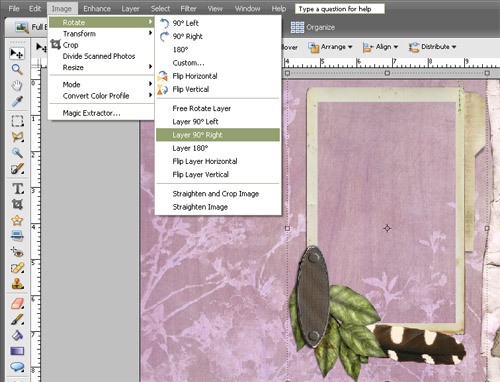
For example, with the clustered frame select Image>Rotate Layer 90 degrees right. You’ll see that the shadow is now located at bottom left.
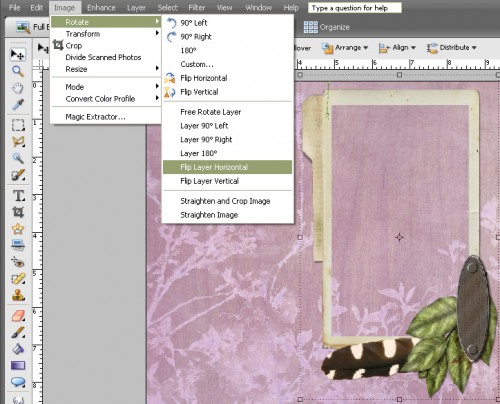
This will take some practice and experimentation, but to give the shadow the correct bottom right location, now select Image>Flip Layer Horizontal.Now, that looks pretty good.
Please note that with clustered frames like this or other elements with special shadows…they may only look “right” in the direction we created them…that’s why they are given special treatment with special shadows…it’s always fun to experiment, though, and see if other variations work!
Remember…the next time you rotate by 90 degrees or more and if you didn’t flip as well, you may need to take a good look at where your shadows lurk!

