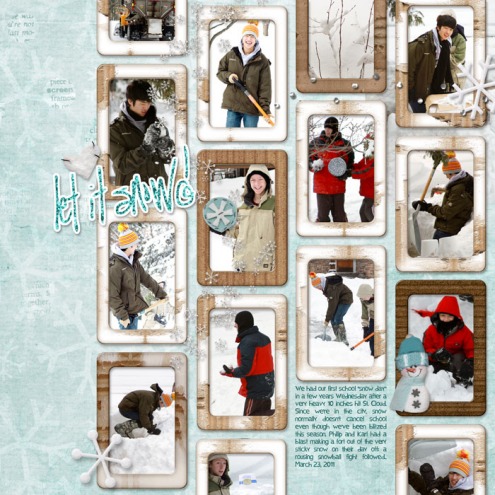
Hello everyone! This morning I wrote about tropical vacations and now we’re back to our regularly scheduled program: winter. We had our first school “snow day” in a few years Wednesday after a very heavy 10 inches hit St. Cloud. Since we’re in the city, snow normally doesn’t cancel school even though we’ve been blitzed this season. Unlike my brother Todd’s family who lives in rural SW Minnesota where they have had over six full snow days this year and oodles of late starts. Wowsers! It’s time for spring!
Philip and my cousin Karl had a blast making a fort out of the very sticky snow on their day off; a rousing snowball fight followed. I captured the fun and will always remember this winter because of documenting it with photos and stories.
michelle shefveland. blustery blues pak, scrap.frames 12
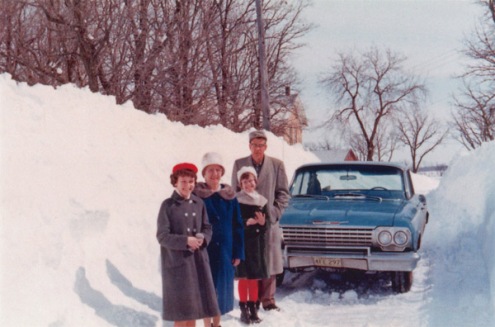
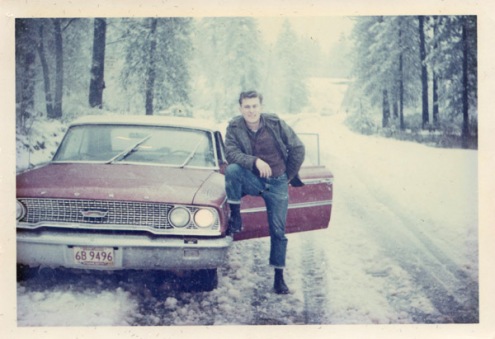
Just like my dad’s photos below. When I called him on Wednesday complaining about the snow in March, he said, “That’s nothing; in 1965 we had 55 inches in March!” And because they took photos, he has proof! Another reason to scrapbook…your stories have back-up (just kidding Dad!).
earl terhaar
hank terhaar
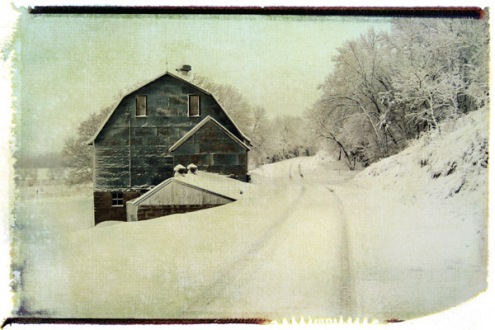
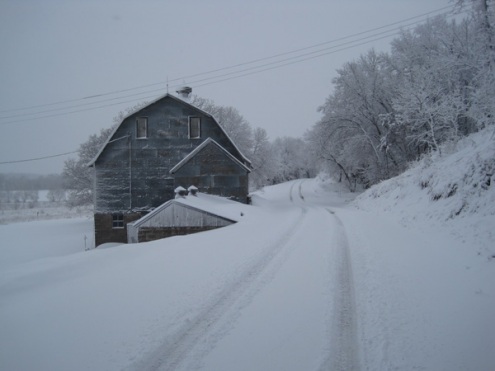
Back to the tutorial! Todd e-mailed me a shot of their hobby farm barn after Wednesday’s storm. The winter is getting a bit long to say the least, but when you can capture its beauty it’s much easier to swallow!
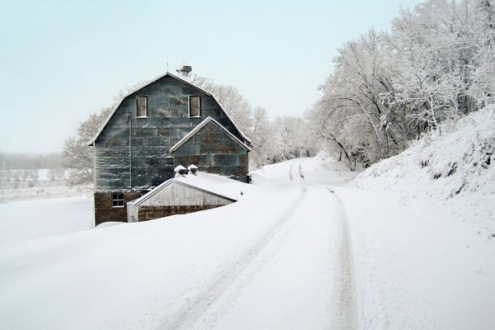
Today I’m going to show you all I did to get to the finished image above starting with Todd’s photo (below) straight out of his cell phone. It has a 5 MP camera so we can get a very nice 8×12 out of good images. They just built a new house so having a print of their first winter seems fitting!
original by Todd Terhaar
Using Adobe Photoshop or Photoshop Elements, follow along (Paint Shop Pro is very similar!). Click on images to enlarge.
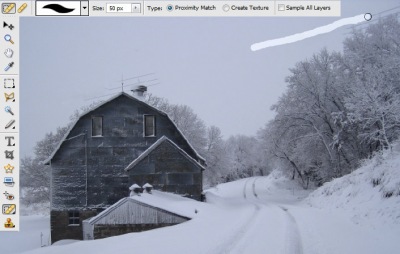
- I always clone and heal an image before doing any other image enhancements. The Spot Healing brush is perfect for getting rid of the large areas of electrical wires as they are surrounded by solid skies. Make sure you set the Tool Option to Proximity Match.
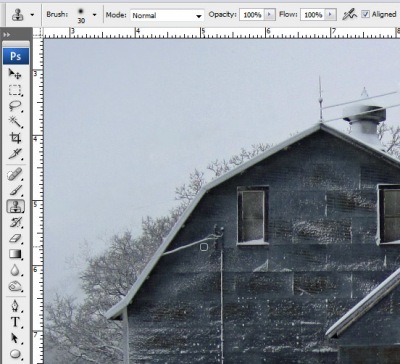
- Most of the time spent on this image was on cloning away the wires near the barn and trees. See my more detailed tutorial on cloning here. I made my brush progressively smaller the closer I got to the barn.
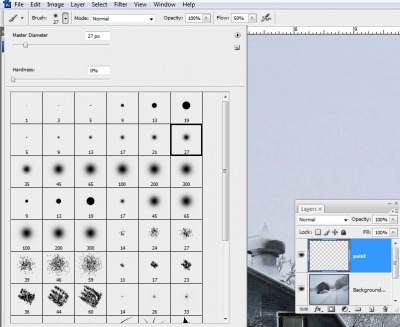
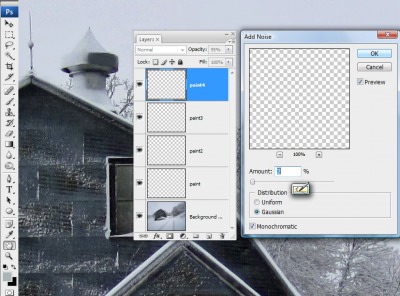
- Because Todd and Susie may frame this print, I spent extra time painting back in details lost by cloning and to add definition since everything was so monochromatic. Using a soft small round brush I sampled color and painted in the shapes on a new layer. Choose Layer>New Layer
- For added realism I add noise when I paint in details. Select Filter>Noise>Add Noise. For my image, I set it to 2% and Gaussian.
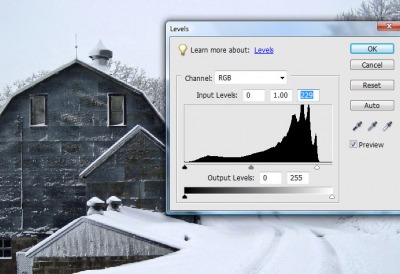
- Adjust the Levels of your image. This one is underexposed; common for snowy, cloudy day images where the exposure compensation is not adjusted (check your point and shoots and cell phones; they may have the ability to adjust this before shooting). Select Enhance>Adjust Lighting>Levels. Bring right slider to end of histogram to lighten highlights. If needed adjust shadow slider.
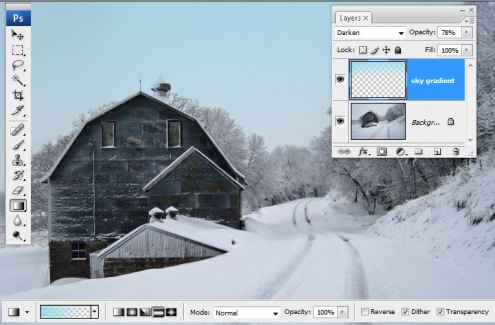
- For the real punch I add a soft blue sky to cloudy images. To do so, sample a light blue for the foreground color. Add a new layer. Select the Gradient Tool and choose the Foreground to Transparent option (second one in the default Gradients). Click with your mouse at the top center of the image and while holding the mouse drag downward to just past the horizon. Release mouse. Press Undo if not satisfied and repeat process. Set to Darken blend mode and opacity of choice depending on color of blue. The key is to make it look realistic.
- Save a layered PSD of the editing process if you want to be able to edit. Flatten image. Duplicate layer (Layer>Duplicate Layer) and to add the last bit of punch set the top layer to Soft Light at about 20%. See another twist on giving your image some pop in another tutorial here.
- This is the finished image after editing.
- And here it is after I added a photo transfer effect with my Photo Art Blends (tutorial included with each set) michelle shefveland. Nature’s Sketchbook Photo Art Blends 3 (used #09 – transformed to 8×12 from 12×12 and set to multiply blend mode)
So if you are willing to spend a bit of time and practice a bit, you can really enhance your so-so images! You may ask, why would I spend so much time on an image instead of getting it right “in-camera”? Well, sometimes the weather doesn’t cooperate. Sometimes someone else takes the photo and I’m not able to be there. Sometimes time only allowed one shot and the camera settings were incorrect. And, sometimes I just like to challenge myself and improve my skills!
Keep learning! Michelle

