michelle shefveland. scrap.templates 28, art journal fresco papers
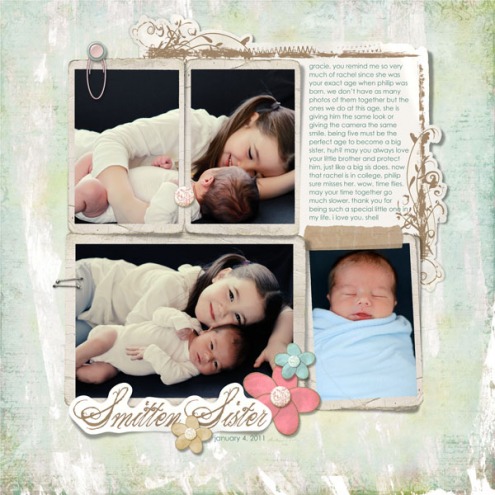
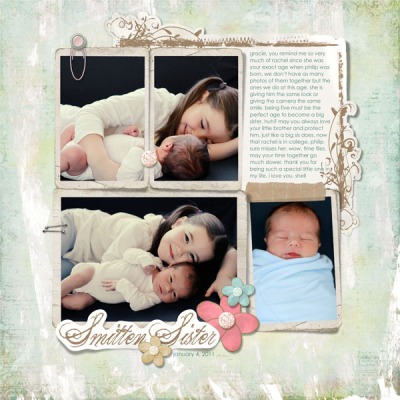
If you’ve used our Scrap.Templates before, you know there are text layers provided for titles and journaling. With one from our newest set, I used the title text layer to create a sticker title. Some added dimension is always fun and gives even more realism to a digital layout. See below for how easy it is to do!
For this tutorial we will use Adobe Photoshop Elements, however, other image editors utilizing layers follow similar steps.
- Open Adobe Photoshop Elements.
- Open Scrap.Template of choice. Sample is using 01 from Scrap.Templates 29.
- Open photos; size, and move into position. Clip to photo masks. See our Scrap.Templates Tutorial included in the download for more step-by-step instructions.
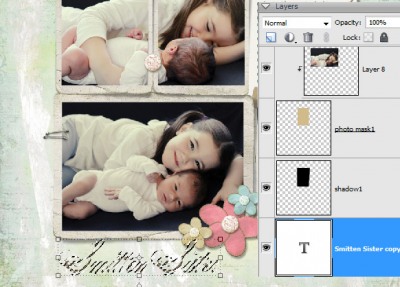
- Double-click the title text layer on the Scrap.Template (where it says ‘enter title here’). Doing this will highlight the type and activate the Type Tool on the toolbar (T). If desired change the font and font size.
- Click the Text Color box and using the Color Picker tool click on any color in the layout you’d like to use for your text color (or keep the brown that was in the template).
- Enter title of choice. Font used in sample is The King and Queen.
- Select Title pixels by pressing Ctrl-key (Command key on a Mac) while clicking with mouse on the thumbnail in the layer palette. Dancing ants will show up around title.
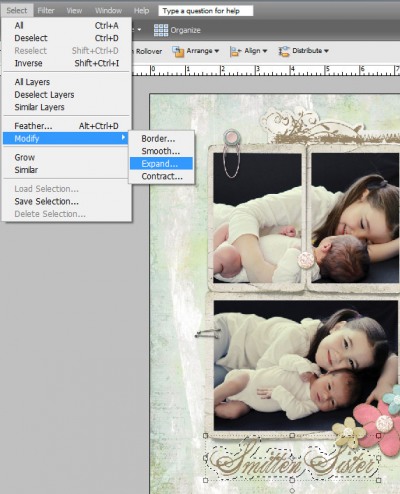
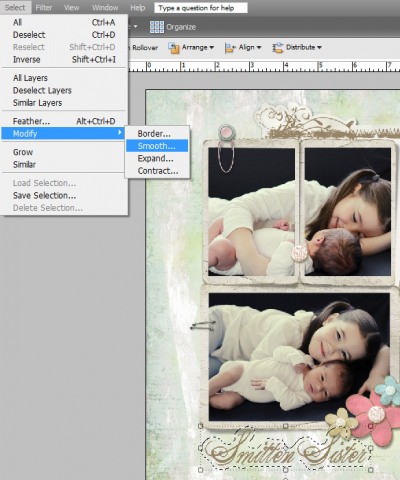
- Expand size of selection. Choose Select>Modify>Expand>30 pixels or size of choice.
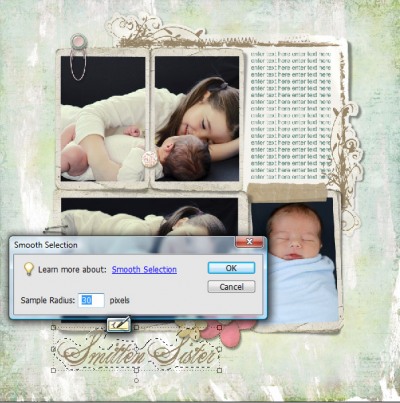
- Smooth selection until satisfied with sticker shape. Choose Select>Modify>Smooth>20. Repeat if not smooth enough. Make sure there are no inner sections not selected inside the title. If so, add to your selection by drawing around these shapes with the Lasso Tool.
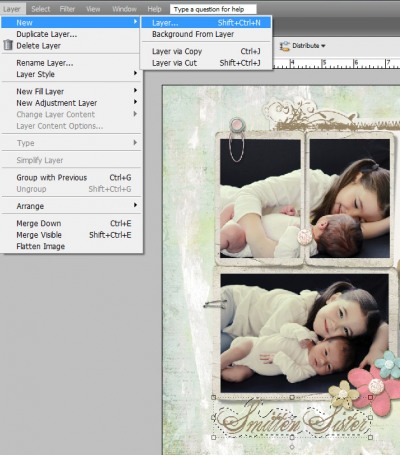
- Click on the layer right below the Title layer. Add new layer (Layer>New Layer).
- Select color for sticker border. Click on Foreground Color Chip and with color picker sample color desired. I sampled the cream in the journal mat.
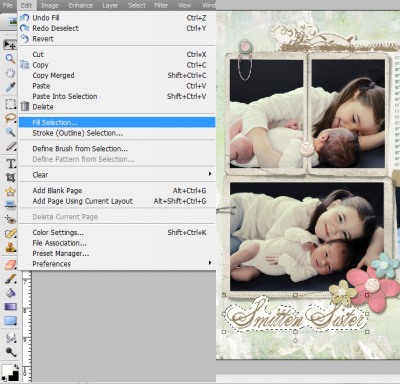
- Fill selection (Edit>Fill Selection).
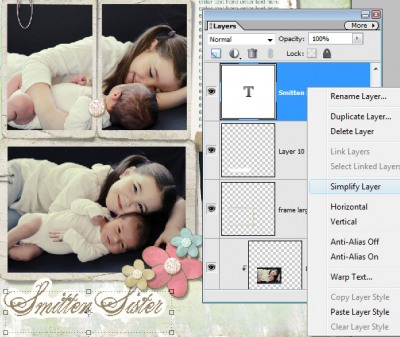
- Simply text layer. Select title layer and choose Layer>Simply Layer.
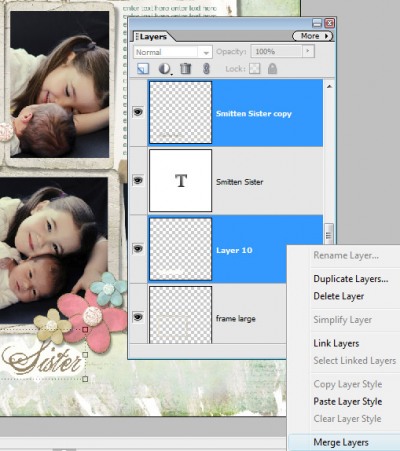
- Merge text and sticker background. Click on both layers while holding Ctrl key (Command key on a Mac), right click and choose Merge Layers.
- Add a drop shadow to sticker. You could apply a canned drop shadow layer style with settings such as 120 degrees, Size 19, Distance 20, Opacity 40%. I added a custom lifted drop shadow to give it a bit more variation in the lift. You can learn this technique in my tutorial here.
- That’s all there is to it! You can do this on any layout; try filling the sticker background with papers or photos, etc.
Happy creating! Michelle

