
Converting a Color Photo to Black and White Using

(Jasc Paint Shop Pro, Corel PHOTO-PAINT,
Adobe Photoshop, and Ulead PhotoImpact would follow similar
instructions)
|
It is very easy to convert a color photo
into a black and white photo. There are several methods to do this,
but this tutorial focuses on the Hue/Saturation Tool.
Not all color photos will look good as a
black and white photo. Look for photos with good contrast and natural
lighting. Photos with a light source from the side usually look great
as black and white images. (See example at right).
What you’ll need:
You’ll learn how to:
|
 |
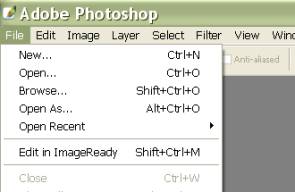
Open Adobe
Photoshop or Photoshop Elements.
Open your Photo.
Choose
File > Open and browse your system for photo.
Click photo of choice and then choose
Open.
|
|
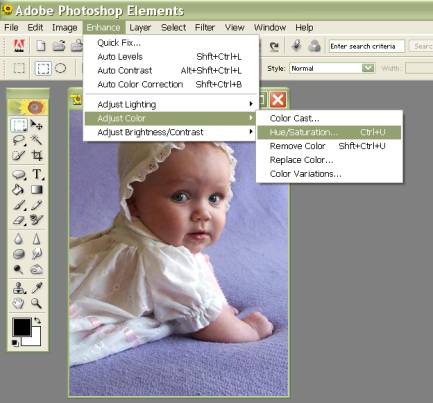
We are going to use the Hue/Saturation
command to change this color photo to BW. There are several other
ways to do this, but this method is simple and produces good results.
Choose Enhance>Adjust Color>
Hue/Saturation.
(Keyboard shortcut CTRL+U)
|
 |
|
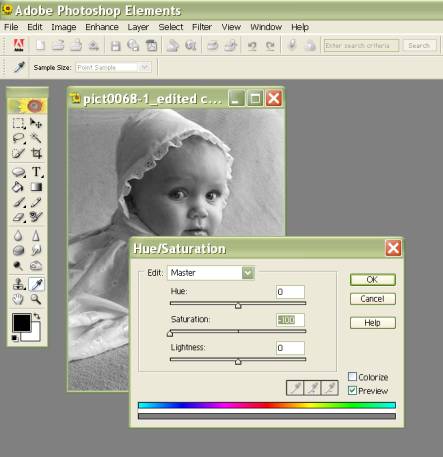
In the Hue/Saturation box, drag the
arrow under “Saturation” all the way to the left.
This removes the color from the image.
Press OK. |
 |
|
You now have a black and white photo,
but there is one more quick step that can really enhance the
highlights and shadows.
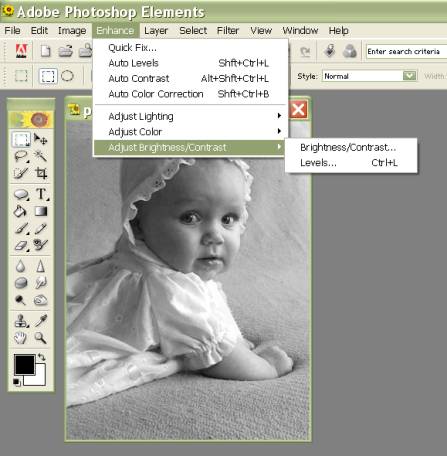
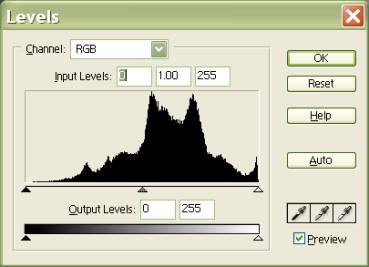
Choose Enhance > Adjust
Brightness/Contrast > Levels.
(Keyboard shortcut CTRL+L)
|
 |
|
Click on the right arrow below
the Histogram, and drag it towards the center. This will lighten the
highlights.
Click on the left arrow below the
Histogram, and drag it towards the center. This will darken the
shadows.
Move the arrows very slowly.
Don’t make drastic changes with the levels tool or your photo will
start to look artificial.
Press OK. |
  |
|
Now you have a nice Black and White
photo with good contrast.
Tip:
Be sure to save the new photo with a different name so you can always
go back to the color version.
|
 |
Written by Roseanne Miske 2004,
Copyright CottageArts.net, All Rights Reserved |

