
|
Deleting and
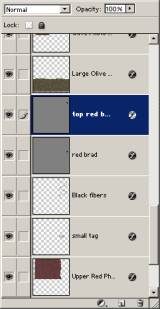
Duplicating Layers within Layouts Tutorial Let’s say you’ve changed the colors of the Winter Wonders.psd layout (see tutorial on changing colors) and now want to delete the two red brads that clash with the plum color you’ve changed the photo mats to. It’s so simple! · Open Adobe Photoshop Elements · Open “Winter Wonders.psd” from your CD drive (File/Open) and open the Layers Palette on the right as shown below. Note: the layouts on your CD will have the photos faded out. · Select the top red brad by clicking on it in the Layers Palette:
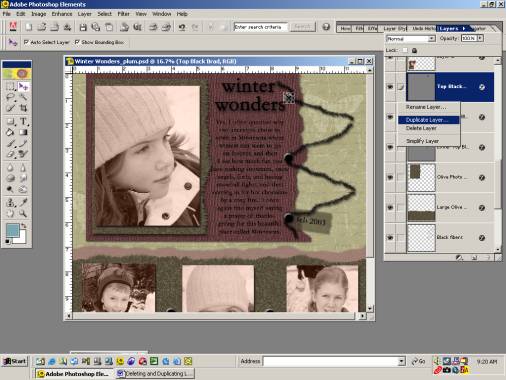
· Right click on this top red brad layers and the following selections will appear. Click on Delete Layer and then Click on Yes when asked to confirm Deletion. · Delete other red brad in same manner.
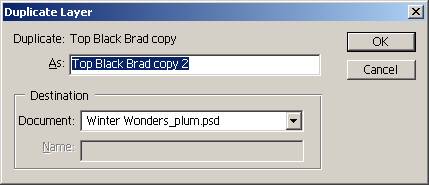
· So now, your layout really needs some help as you’re missing two brads! Don’t worry; we’ll fix that in a jiffy. · Open the Layers Palette again and select any of the black brads. Right click on the brad layer, and select Duplicate Layer. · Duplicate Layer Dialog Box will appear. Rename new brad to name of your choice and the default destination is the current layout. Press OK. Note: you can duplicate layers to other files, as well, which is very useful for copying embellishments from one layout to another! · With the Select Tool, select the new brad, which will have been placed right on top of the brad you duplicated. · Once selected, just drag where you want it, which should be where the red brad was. · Repeat for second copy of brad. · Now you can look with pride on your color coordinating brads! Remember to save as a new file on your hard drive. |


