|
Creating
Photo Background Layouts
using

(Same tutorial using
Jasc Paint Shop Pro 8 click here)
(Jasc® Paint Shop® Pro, Adobe® Photoshop®, Corel® PHOTO-PAINT,
Ulead PhotoImpact 7 and higher, and Microsoft® Picture It!® Digital Image
Pro would follow similar instructions)
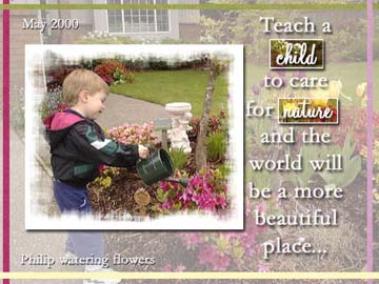
One fun technique
available to digital scrappers is making your own background paper out of
photographs. You can then make an entire layout using just one photograph.
|
 |
What you’ll need:
·
Adobe® Photoshop®
Elements
·
Photograph in digital
format You’ll learn how to
make:
·
Vellum
·
Shapes (stripes and
photo mats)
·
Drop Shadows
·
Text
|
|
|
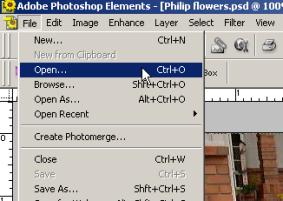
Open Adobe Photoshop Elements
Open Photo within Photoshop Elements
- Choose File > Open and
browse your system for photo.
-
Click photo of choice
and then choose Open.
|
|
|
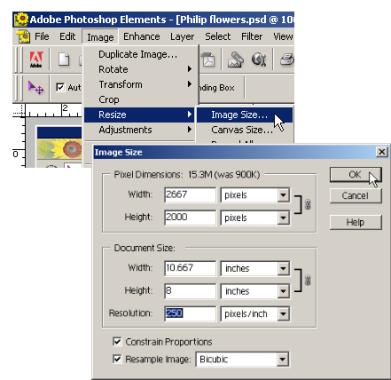
Resize Photo
Resize Image: Choose Image>Resize>enter
your preferred size and dpi. Choose OK. |
|
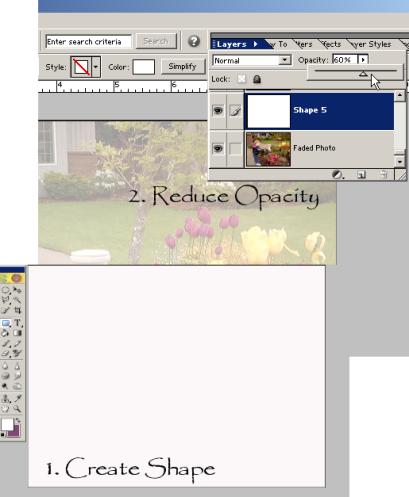
Create Vellum Overlay
- Select Rectangular Shape Tool on
Tool Bar.
- Choose White Foreground Color
(Type X on keyboard to make foreground default to White).
- Using mouse draw rectangle to
cover photo.
- Decrease opacity. Click Layers
at the top right of the menu panel so the Layers Palette expands, as shown
below.
- Choose the white shape layer and
at top of layer menu, lower opacity to desired amount; for mine I chose
60%.
|
|
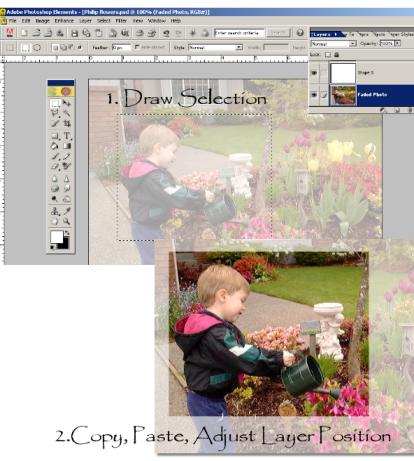
Create
Focal Photo from Background Photo
- Choose the Background photo
layer in the layer palette.
- Select the Rectangular Marquee
Tool on the tool bar. Using the mouse, draw a shape over what you would
like to be the focal point. I drew a shape to include the boy and the
watering can.
- Choose Edit>Copy (Ctrl-C)
and Edit>Paste (Ctrl-V).
- Move the new focal photo layer
up above the vellum layer, by clicking and dragging upward in the layer
palette.
|
|
Add Photo Edge or
Photo Mat
- I created my photo edge shown at
the top of this article using Jasc Paint Shop Pro’s Layer Masks function.
They also have awesome Frames with messy edges. Get a free trial version
of Paint Shop Pro at
www.jasc.com.
- You can also create a simple,
rectangular, white mat to accent this focal photo by repeating the steps
above to make the vellum overlay (don’t reduce opacity, though).
- First make the layer below the
photo the active layer (so the new shape will be below the photo in the
layer palette).
- Draw the rectangle to be about ¼
inch larger than the focal photo on all sides.
|

|
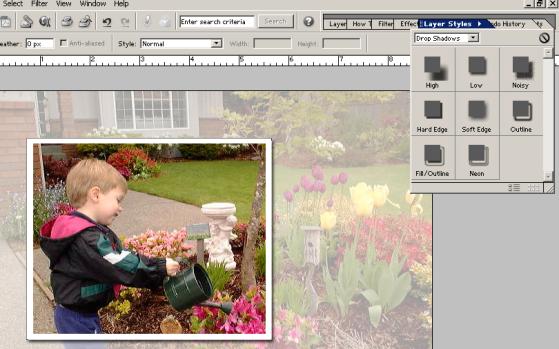
Add Drop
Shadow
- If desired, add drop shadow to white
shape, for added dimension.
- Choose Layer Styles on right menu panel,
select Drop Shadows from drop down menu, select Low, or your preference
(see Adobe’s help for more information on adjusting your preferences).
|
|
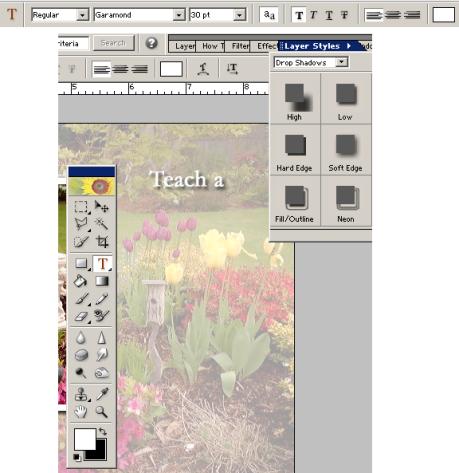
Add Text
- Click the
Text tool on the tool bar and set the text options as below:
Font: Garamond,
Microsoft; (also used Monterey BT, MyFonts.com)
Size:
30 - dependent on size and dpi of your layout (tip: the dropdown
shows a maximum size of 72 points for font size, however, just highlight
the size with the mouse and type in any size you’d like)
Click the Text Color Box on the
top Tool Options Palette.
Color: Using the color
picker tool, click on any color in the photo you’d like for your text
color. I chose white (HTML: FFFFFF).
-
Place cursor in position on layout
where you want title to appear.
-
Type title, adjust position and
size, if necessary.
-
Add additional text in different
fonts and colors, where desired.
-
Add drop shadow, if desired.
|
|
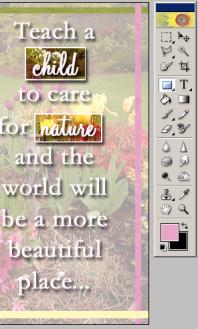
Add
Accent Shapes
- Using same instructions as for
the photo mat, create long stripes around the edge of the layout using
different colors for each.
- Also, create other accent photos
(beneath “child” and “nature”) with white mats and shadowing, by repeating
steps above.
Save Layout
You’re done! Save as a .psd file
to retain layers (choose File > Save > Format: Photoshop *.PSD).
Save as a .jpg to share on the Internet (resize to 72 dpi for this
option). Good luck enjoying the ease and versatility of digital! |
|
Michelle Shefveland, CottageArts, LLC, Copyright
2004, All Rights Reserved |