|
Creating
Photo-Filled Text
using Adobe®
Photoshop®/Photoshop Elements
(Corel® Paint Shop® Pro, Adobe® Photoshop®
Elements, Corel® PHOTO-PAINT,
Ulead PhotoImpact 7 and higher, and Microsoft® Picture It!® Digital Image
Pro would follow similar instructions)

There are various
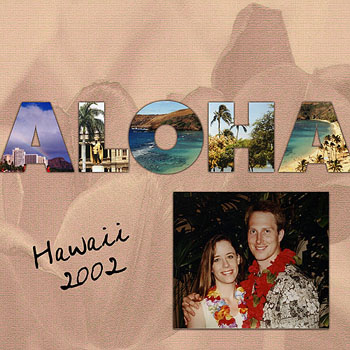
ways to fill text with pictures, textures, etc. when working with digital media.
This is probably the most straightforward, and probably the simplest, way. This
layout and tutorial were created using Adobe Photoshop, however, Photoshop
Elements would work exactly the same.

-
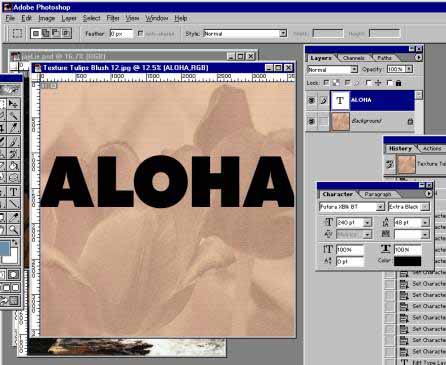
Choose a typeface that suits the style of your layout and affords you adequate
space to display the photos or patterns you wish to use inside the letters. I
chose Futura Extended Bold in this case because the strokes of the letters are
very broad. The color of the type does not matter, because the type layer will
not show in your finished layout. Position your type exactly where you want your picture-filled type to be located on
the page.

-
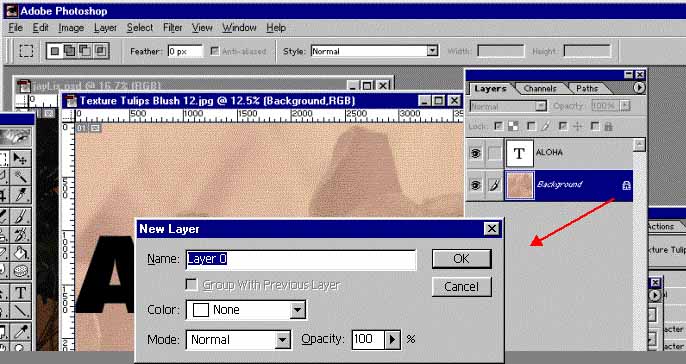
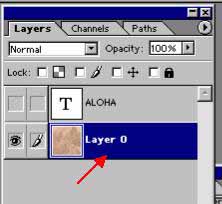
When I opened the background paper in Photoshop, the layer
by default is a ‘Background’ layer, which is locked. To unlock this layer for
editing, double click the padlock icon on the layer. This will bring up the new
layer dialog box. Clicking the ‘OK’ button on
this box will convert the layer to ‘Layer 0’ which is an unlocked,
editable layer.

-
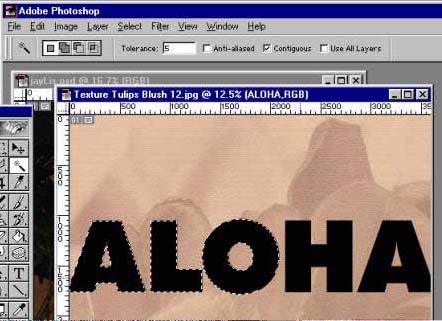
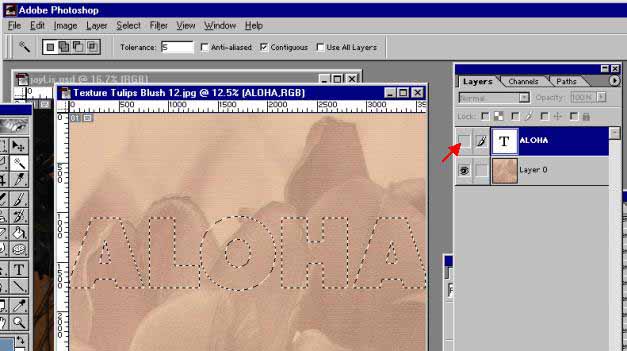
Using the Magic Wand tool, select each of the letters of the
word. Holding the shift key down while you click each letter will allow you to
select each letter, adding to – rather than replacing – your previous
selection.

-
After you have selected all of your letters, turn off the
visibility of your type layer by clicking the little box with the ‘eye’ icon in
it. This will leave your selection visible over your paper layer – in this
case, ‘Layer 0’.


-
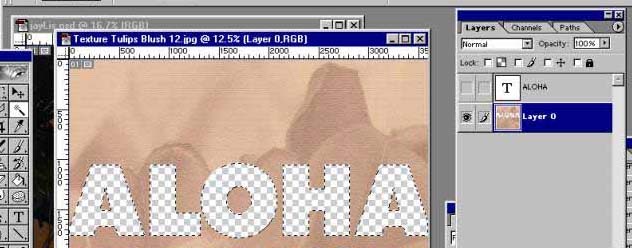
With your selection still active and your paper layer
selected, press your ‘Delete’ or ‘Backspace’ key on your keyboard, or Edit>Cut
(Ctrl-X). This will
delete the parts of your paper layer within the selection, making holes in the
shape of your letters, similar to a traditional paper punch (And, because this
is digital, you don’t have to worry about the middle parts of your letter A’s
and O’s because they stay put!).
-
Press Ctrl-D
(Select>Deselect) to remove the selection.

-
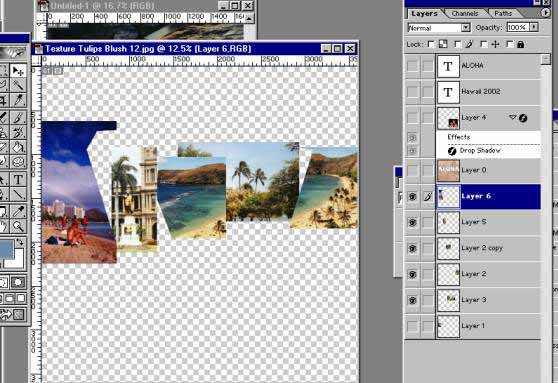
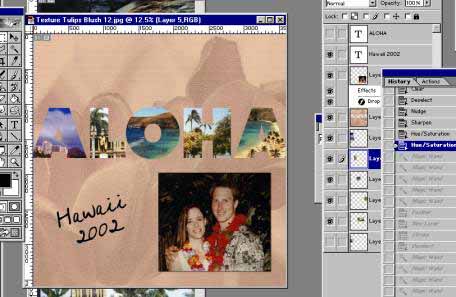
Now, you can just position your photos, textures and other
papers on layers behind your paper layer, so they show through the holes. I’m
showing you what the pictures look like with the paper layer turned off – so
you can see that I’ve trimmed them to keep them from overlapping, but I did my
positioning with the paper layer visible, so I could position the photos right
where I wanted them.

If you'd like to see Melissa's technique for adding a drop
shadow in order to make our photo-filled letters look like they were placed on
top of the paper instead of behind it,
click here.
Written by Melissa Prostrollo, Copyright 2003, CottageArts.net, All Rights
Reserved.
|
|

