

|
|

(Using with Adobe® Photoshop® and
Photoshop® Elements, Adobe PhotoDeluxe®,
Ulead PhotoImpact 7 and higher, and
Microsoft® Picture It!® Digital Image Pro
Welcome to the wonderful world of scrapbooking with the aid
of digital tools! If you haven’t found
yourself caught up in the current wave of enthusiasm spreading throughout the
world for this wonderful hobby, it may just catch you yet! Our product line, Simply Digital™, offers CD's of custom
designed layouts, background papers, and embellishments to help you create
stunning digital layouts, or to print for use in traditional
scrapbooks. Our CD's work in conjunction with many digital imaging
software packages, such as Adobe®
Photoshop® and Elements®, Adobe PhotoDeluxe®, Jasc® Paint Shop™ Pro® 7 and higher, Ulead PhotoImpact 7 and higher,
and Microsoft® Picture It!® Digital Image Pro (.psd layers are flattened in
Digital Image Pro). All of our backgrounds and
layouts are saved as full-sized 300 dpi images for high print quality.
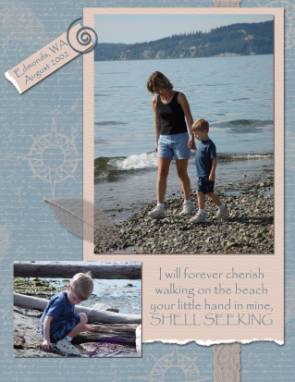
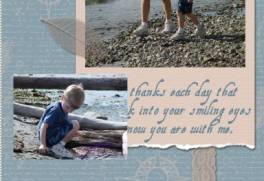
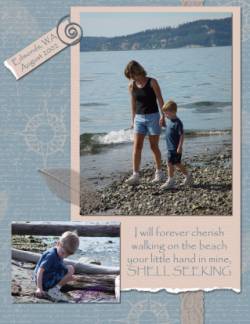
Incredible digital imaging software packages, such as Jasc Paint Shop Pro 8 (PSP), are allowing people to capture and preserve their memories digitally, as well as assist traditional scrapbookers. The layout above is just one example of what can be done using Simply Digital™ layout templates with PSP. All you need to do to make it your own creation is add photos and journaling and your layout can be shared on the web or printed and stored in your favorite scrapbook album. If you want to be really creative, change the colors of the papers, rotate the mats, add more paper layers, tear edges, add embellishments, apply filters and effects to the layers, and so on. The possibilities are virtually endless!
Many of the printer companies are becoming aware of the need for archival inks, as well as papers, making printing your special layouts safe and easy. There are now also wide format printers on the market, allowing you to use 12” x 12” archival scrapbooking paper from Epson. This is very exciting, as so many scrapbookers prefer this size format. Another option for printing your layouts is to save them to a CD in .tif or .jpg format at 300 dpi and take to your local print shop, such as Kinko’s, where they can print an 8.5”x11” color copy for around $1, on archival laser paper. You can then mount it on cardstock for stability and place in your album.
Below is a quick tutorial on how to create a quick, digital scrapbook layout using one of the Simply Digital™ CD layout templates with Paint Shop Pro. The templates already have the background paper created, as well as photo mats, embellishments, and sample titles to help you create beautiful layouts in little time.
What you’ll need:
Jasc Paint Shop Pro 8
Simply Elegant Volume 1 Version 2 CD
After completing the exercise, you should be able to:
Create a scrapbook layout using PSP with the help of a layout template!
Add photos
Move and Re-size photos
Re-name layers in Layer Palette
Add drop shadows
Make unwanted layers invisible (rather than deleting them, so you can use them at a later date)
Add text
Save layout for printing or for web display
OPEN PAINT SHOP PRO AND TEMPLATE:
Insert “Simply Elegant” CD in CD drive
Open Paint Shop Pro 8
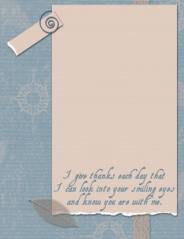
Clicking on the top menu, select File/Open and open “Give Thanks.psd” from your CD drive in the 8.5 x 11 Layouts folder.
Save File: It’s now a good idea to save the file on your hard drive as a .pspimage or .psd file to retain the layers.
ADD PHOTOS:
Let’s add some photos from your file system to the layout so it can start to look like YOUR creation!
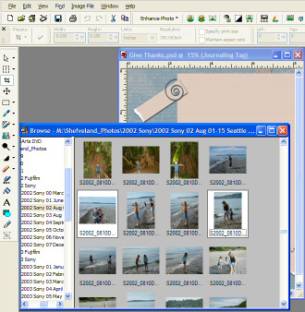
Click on the top menu File/Browse and browse your system for a particular photo or photos you would like to add. A browse window will appear with thumbnails of your photos.
Click and drag photos from the browse window onto layout, as shown below.
The photo layers come into your layout based on what layer in the layer palette was active, so move them upward or downward in the Layer Palette by clicking and dragging on the photo layers, one at a time, until they are situated as you desire.
Resize photos, if necessary, using the Deform tool, positioning pointer in one of the corners and dragging inward with the right mouse button clicked to decrease size proportionately.
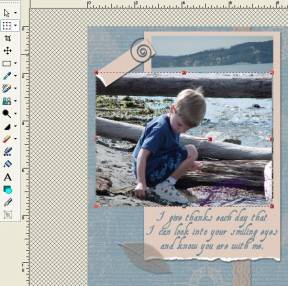
Rename photos (named “Background” by PSP) by right clicking on each layer and selecting Rename command.
Now, using the Move Tool on the left toolbar (see above for the fourth icon highlighted blue), move the photos and leaf to desired position.
MAKE LAYERS INVISIBLE:
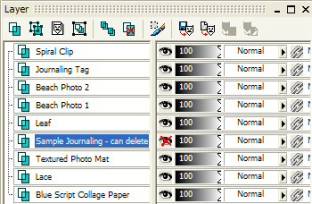
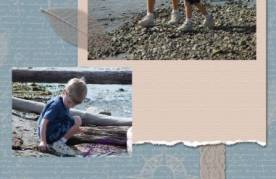
Each layout template comes with sample journaling or poetry that you can use, if you wish. It is not editable text, so if you want to change the words, you’ll need to make it invisible or delete it (Note: you can move, re-size, and change colors of sample text, if you wish). Make the “Sample Journaling” layer invisible by clicking on eye image in the Layer Palette to the right of the layer name. See red X through eye below. This is a great feature to use when you want to test different photos or colors on a layout, as well.
APPLY DROP SHADOWS TO PHOTOS:
Nothing adds more realism to digital layouts than drop shadowing. Select a layer that needs drop shadows to be applied. In this layout, they are the Beach Photo 1 and Beach Photo 2.
To add drop shadows, click on Effects/3-D Effects/Drop Shadow. The following options will appear:
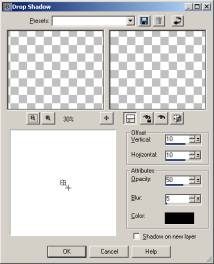
You can adjust the offset, opacity, blur and color of the drop shadow, so now is the time to play around and come up with your own look!
ADD TEXT:
Select Text Tool (A) from the Tools toolbar on the left side of screen.
Select font, point size, width and other options on the top menu bar.
Select text color in foreground color box of Materials Palette. You can use the Color Picker to click on area of layout to replicate same color (in this case, the background paper).
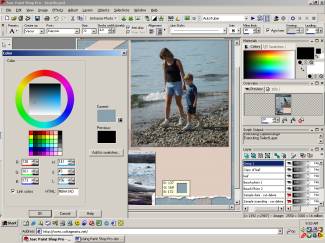
Click on area of layout where you want to start entering text and the Text Entry box will appear.
Just enter your text and click on Apply when complete. Rename this layer in the Layer Palette (right click on the layer) to something more explanatory, such as “Journaling text”.
For journaling tag text, you will need to rotate it to align it with the angled tag.
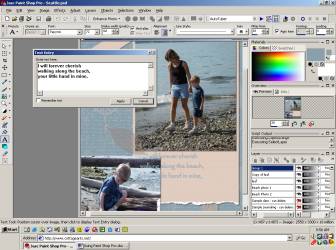
After editing some of the words to fit better in the journaling area, as well as darkening the text color a bit to stand out more, the final result is below, showing details of the drop shadows, as well.
Congratulations! You have created a work of art that will last for future generations to cherish.
SAVE FILE FOR PRINTING AND/OR WEB DISPLAY:
Save final image to same filename as in beginning of tutorial. You can print directly from this file for high resolution.
If burning to CD, save as full-size .jpg, .tif, or .bmp file format.
For posting to Internet sites or e-mailing to family and friends, also save to different name at 150dpi, 4.5 inches wide, .jpg format, keeping file size less than 100KB (some sites require 72dpi).
Great job!
Michelle Shefveland, CottageArts.net, Copyright 2003, All Rights Reserved
