|
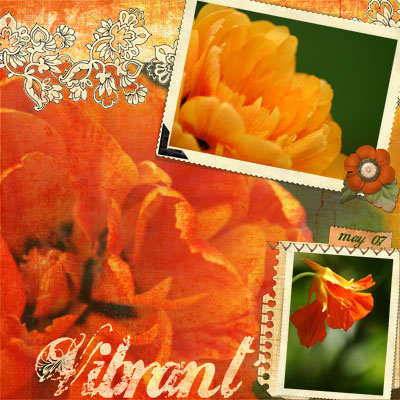
Supplies:
Naturals 8 Paper Pak,
Scrap.Frames 1,
Butterfly Wings 3 Element Pak (flower flourish)
Layers are one of the most useful
features when using digital imaging software. There are many packages
that use layer functionality, some of them being Adobe Photoshop and
Photoshop Elements, Microsoft Picture It! Digital Image Pro, Corel
Paint Shop Pro, and Ulead PhotoImpact. Layers allow you to work
separately on the various components of your image or layout.
Simply put, layers are separate images
“layered” on top of each other that can be manipulated individually.
Each layer is really just a portion of the final image. The final
product will be made up of all of the layers within the image
depending on the order that the layers are in and the opacity and
layer styles (such as drop shadows, bevels, etc) that are set for each
layer. You can work on each layer as if it were an independent image,
without worrying about the contents of any other layer. This is a
great feature when you want to experiment with “painting” on a
background. You can add a layer on top of the background and “paint”
to your heart’s desire. If you end disliking your design, you can
just delete it and you still have your background intact.
The
Layer Palette default location is the lower right side of your screen
and is a very useful tool to work with your layers. The Layer menu
on the top left main menu bar also has many options to adjust your
layers. See image below of Photoshop Elements 5 and the many
different layers that make up this digital layout, as shown by the
thumbnails on the right in the Layer Palette. The bottom-most layer is the
background layer and everything builds on top of that layer.
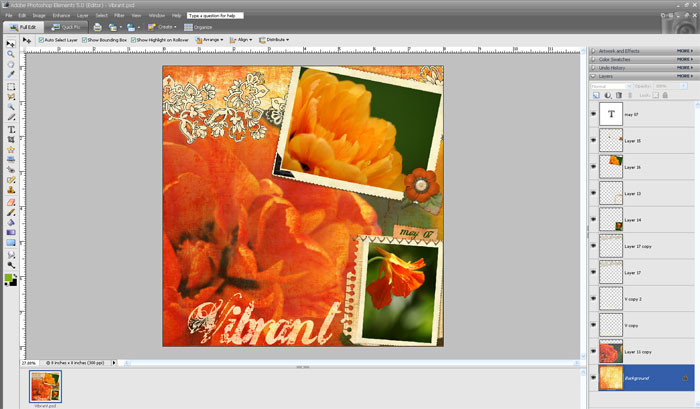
As you can see from the image above, the bottom layer is the
distressed orange paper and right above this is the large tulip photo.
Above that are the accents, frames, other photos, and text layers.
When you drag anything
onto a layout,
add text, create a shape, or paste a photo into an image, a new layer
is created automatically. You are also able to create additional
layers by selecting Layer > New (or clicking on the New Layer icon in
the Layer Palette).
The following are changes you can make
to layers right within the Layer Palette:
-
Change the order of
the layers in your image by clicking on a layer and dragging it up or down in the
Layer Palette.
-
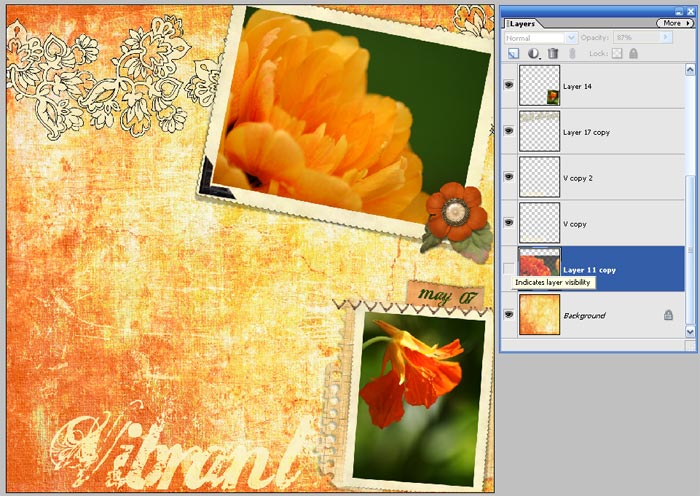
Make a layer invisible and not appear on the image by clicking on the left most box
with an “eye” icon. Click to remove the eye and the layer will
“disappear” from view. This is great when you are testing out
different ideas for a layout. As seen below, I made the main focal
tulip photo invisible.
-
Change the layer which is active by
clicking on the layer you want to activate. The active layer is the
layer you can make changes to on the layout at any specific time.
Some changes you can make to a layer are changing the color, changing
the size, changing the orientation, adding texture, adding effects,
etc. As seen above, the large focal photo is the active layer,
as it is highlighted in blue.
-
Deleting, duplicating,
simplifying, or renaming a layer can all be done by right clicking on
the specific layer in the layer palette. These options will then appear for you to select.
Click on the preferred action and specific questions pertinent to that
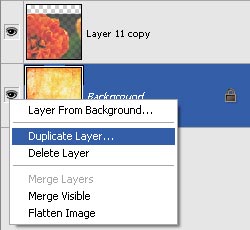
change will appear in a dialog box. For example, in my layout above,
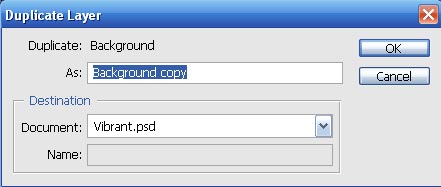
if I selected Duplicate Layer for the Background Paper layer, the
dialog box below will appear. You have the option to rename the new
layer, as well as duplicate it within the same image or onto another
open image. I duplicate layers to other images often when I want to
copy a design element from one layout to another, such as fibers or
tags, or a certain torn paper. When you duplicate a layer within the
same layout, it will appear twice in the Layer Palette.
-
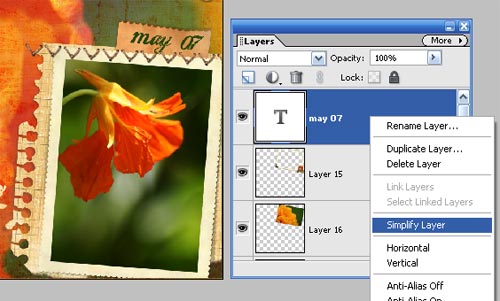
Simplifying a layer -
You can simplify a type layer, shape layer, solid color layer,
gradient layer, and pattern fill layer in order to convert the layer's
content into a rasterized image. Once you simplify a layer, you can
apply filters to it and edit it with the painting tools. However, you
can no longer make changes to the layer using the type and
shape-editing options. I often simplify a layer when I want to apply
a texture to it, such as when I want to create a textured paper photo
mat. As seen below, I can simplify the text May 07 if I
wanted to apply an effect to it.
-
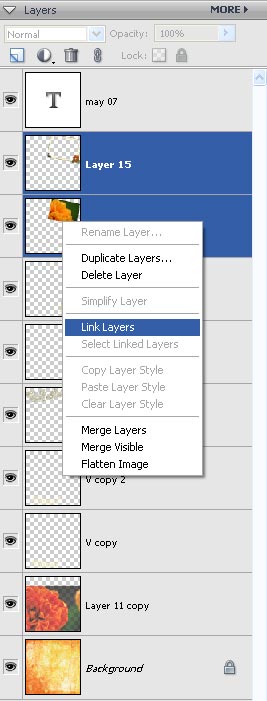
Linking Layers – The Layer Palette offers you the option to group
or link layers. This is helpful
when you want to move or resize a group of layers simultaneously at
the same rate. For example, in my layout above, I would group the
top photo with the frame cluster above it, so they move and resize and
one unit. In that way, I only need to do the action once, and it is
performed on all three layers and they stay in proportion and
positioned together. To link layers, activate one of the layers by
clicking on it in the Layer Palette. Then Ctrl-Click on all the
other layers you want to link with the first layer. Right click
and select Link Layers. This will
put a chain link in both boxex. They will then move together and be
re-sized together.
-
Saving Layered Images - You
should save the master copy of all of your images in PSD (.psd)
format, which allows all the layers to remain intact. You can then
edit the image as required to make other versions at any future date.
You can also save the image in another format, such as .jpg for use on
the Internet, as it is a much smaller file size. If wanting to save
for Internet use, I recommend saving the file at 72 dpi and decreasing
the file size to about 500 pixels wide (6.944 inches at 72 dpi), as this will keep the file
size to around 100 KB.
This is just an introduction on all
that can be done with layers. Experiment and have fun with this great
tool! Once you get a handle on the power of layers, digital
scrapbooking is right at your fingertips.
Michelle Shefveland,
Copyright CottageArts.net, All Rights Reserved |