|
Digital
brushes are
likened to a
paper crafter's
rubber stamps,
but with much
more control and
variability in
their
application.
Some of our most
popular brushes
are the
Scrap.Edges and
Grunge Paints
Series.
Our brush
sets include two
formats: .abr
Photoshop/Photoshop
Elements brushes
and .png
overlays/stamps
in black (for
those who have a
different image
editor).
All sets of
brushes at right
are meant to be
used as stamps
that you "stamp"
with your mouse
or pen tablet on
top of a photo
or digital
layout, but many
brushes are made
to use like a
paint brush by
dragging the
mouse or pen.
Brushes are
different from
overlays in that
they have a more
translucent
effect and allow
more control
over the
color/opacity/hardness
when applying
them.
The Grunge
Paints Series is
fun to use to
create your own
"painted" papers
or grunge
effects on
layouts. Our
Scrap.Edges
Series allows you
to add artistic
edges to your
photos or
digital layouts.
Paper scrappers
can apply these
edges before
printing their
photos and then adhere
to their paper
pages.
Below is
some information
on how to use
brushes in Adobe
Photoshop CS,
CS2, or CS3, and
Photoshop
Elements 3+. See
Michelle
Shefveland's
article in
Legacy
magazine's
April/May 2006
issue for
more advanced
brush techniques
with
Adobe Photoshop
Elements.
|
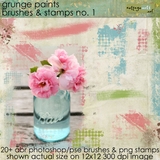
Supplies:
Grunge Paints 1
Brushes,
Scrap.Words -
Inspiration
|
Downloading and
Installing
Brushes
-
Find a brush set
to download. For
this example, we
chose our
Grunge Paints 1
Brush Set.
-
After
purchasing,
download the
brush set zip
file and save to
a folder on your
system. See our
download
tutorial
here.
-
Unzip the brush
set with an
unzipping
utility, such as
WinZip or
Windows XP’s
extract utility.
The brush files
will be in .abr
format.
-
Save the .abr
file to the
Adobe Photoshop
CS or Adobe
Photoshop
Elements/Presets/Brush
folder, which
will be normally
under C:/Program
Files. These
brushes should
be compatible
with Adobe
Photoshop CS and
above, and Adobe
Photoshop
Elements 3 and
above.
"Stamping" with
Brushes
-
Open Adobe
Photoshop or
Photoshop
Elements.
-
Choose File>Open and browse
your system for
a photo to use.
Click Open.
-
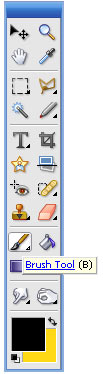
Select the brush
tool from the
toolbar (see
image below left).
-
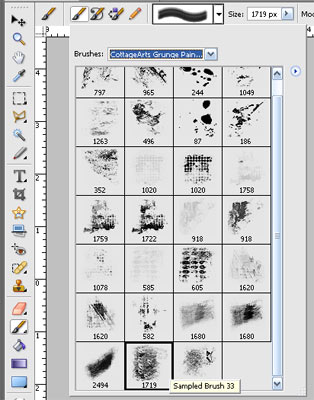
Select your
brush set from
the brushes
drop-down box.
Select Brush of
choice.
-
Select your
desired brush
color in the
foreground color
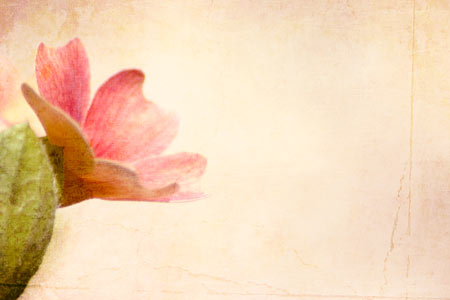
box. We sampled
a pink from the
flower with the
color picker
tool.
-
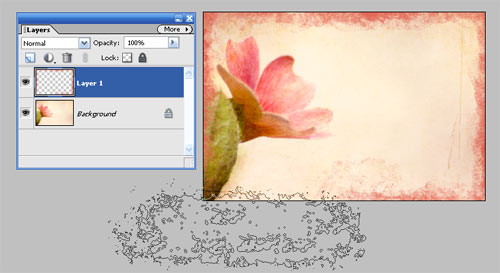
Create a new
Layer (Layer>New
Layer)
-
Click on the
paper or photo
where you want
the brush to
stamp. For this
large sized
grunge
brush, we
stamped along
the edges a few
times.
-
Click on More
Options flyout
to adjust the
angle of the
brush when
needing to stamp
another edge. In
this example we
changed the
angle to 90
degrees to paint
the top and
bottom edges.
-
Adjust opacity
and layer blend
modes, or even
use the Eraser
tool to further
customize the
brush painted
layer.
-
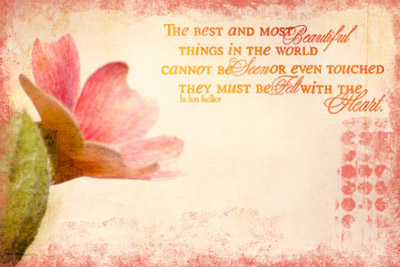
Have fun! Our
final result is
below.

Photo by
Michelle
Shefveland
Supplies:
Grunge Paints 1
Brushes,
Scrap.Words -
Inspiration
"Painting" with Brushes
Instead of stamping brushes with the click of the mouse, as described in section above, you can also drag the mouse or pen along, as if painting. This often works best with small brushes and by adjusting the Scatter and Spacing settings in the More Options dialog. Included with Photoshop/Photoshop Elements are an assortment of brushes that are made to simulate painting. While you may not want to paint a masterpiece picture, you may like to add some simulated chalking, inking or painting effects to your papers and embellishments. These effects look especially nice along the edges of photos or papers.
1. In Photoshop Elements (Photoshop is similar), click the Brush Tool on the toolbar to activate the brush tool.
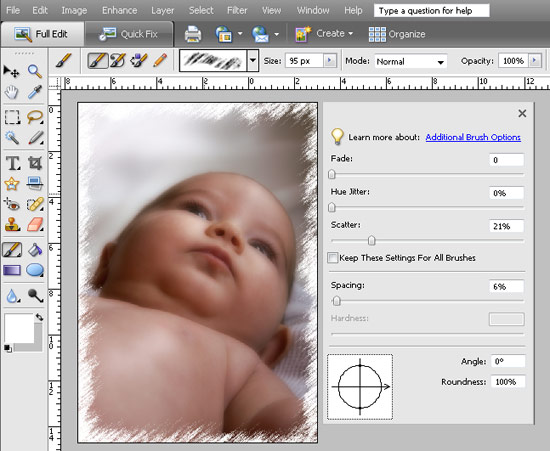
2. In the Tool Options bar at top of screen, click the Brushes flyout arrow to see your brush sets. A good choice for distressing is the Wet Media Brushes, which come standard with Photoshop Elements or Photoshop (see image at right).
3. Select brush. For this sample, we selected Paintbrush Tool Texture Comb. For my 6 MP image, I set the brush size to 95 pixels.
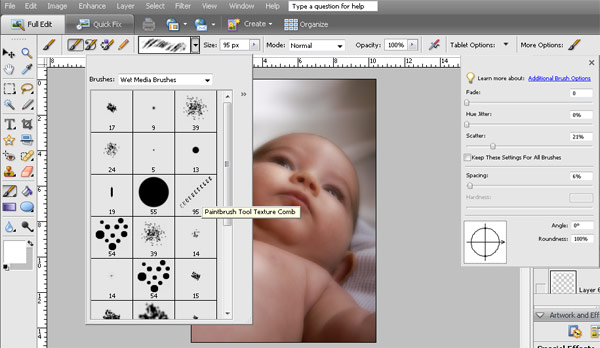
4. Click on 'More Options' flyout (see image above), and adjust the Spacing and Scatter settings for more variability in your paint strokes. We set Scatter to 21% and Spacing to 6%. The preview above on the tool options bar shows how the brush stroke is affected by your settings.
5. Create new layer to paint on (Layer>New Layer). Select color of choice in foreground color swatch (sample used white: FFFFFF).
6. Instead of stamping with the click of the mouse, as described in section above, you can drag the mouse along, as if painting or use your pen tablet.
Optional: Adjust the opacity of the layer and play with the layer blend modes to see the different results possible.
|
|
Brush Use Tip:
Create a new
layer before
adding new brush
strokes, so you
can easily make
changes by
deleting or
erasing on this
layer.
Overlay/Stamp
Use Tip:
The .png files
included with
our brush sets
can be converted
into brushes for
different image
editors, like
Paint Shop Pro
(there is a
maximum brush
size limit to be
aware of,
though, in Paint
Shop Pro). They
can also be used
as "rub-ons" on
digital layouts.
Don't limit them
to black or
white, though.
The shapes can
be selected and
filled with
other colors or
papers for
varying results. Play with your
image editor's
layer blend
modes for a
variety of
results.
CottageArts'
Brush
Usage
terms:
Our brushes
are for personal
use only, unless
you acquire a
professional use
license and your
usage abides by
our terms. More
information is
available
here
Michelle
Shefveland,
Copyright
CottageArts.net,
2010, All Rights
Reserved
|