

|
|

Adding
Photos: Tutorial 1 in a series
of creating a custom layout
(Jasc® Paint Shop® Pro, Adobe® Photoshop®, Corel® PHOTO-PAINT,
Ulead PhotoImpact 7 and higher, and Microsoft® Picture It!® Digital Image
Pro would follow similar instructions)
|
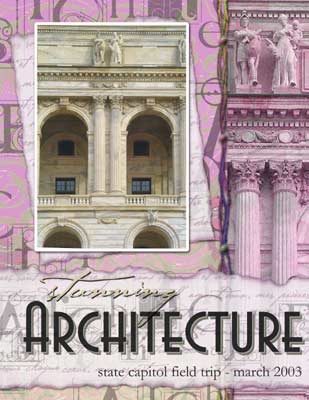
This tutorial is the first in a series of small tutorials guiding you in creating a custom layout using the Simply Digital scrapbook templates, which are in PSD format. Here is a breakdown of the steps this series will cover and to the right is the finished layout you can create:
Supplies needed: Adobe Photoshop Elements 2.0 Simply Digital Template CD (tutorial uses Simply Vacations CD)
|
|
|
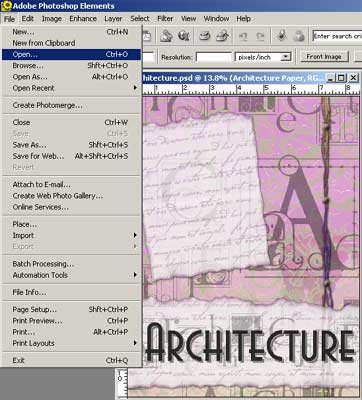
Open Files Open Adobe Photoshop Elements Insert Simply Vacations CD into CD drive. On the top menu, choose File > Open and browse your system for the CD drive. Select 8.5 x 11 Layouts Folder. Choose Architecture.psd. Click Open.
|
|
|
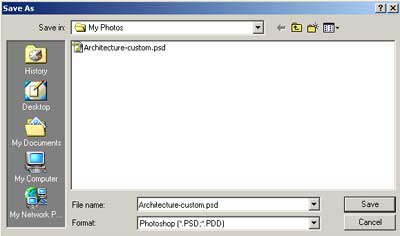
Save Layout Save the layout as a PSD file on your system to a different name, such as Architecture-custom.psd, in this example. Save periodically throughout your design process (Choose File > Save As > Architecture-custom [Format Photoshop] - Click Save).
|
|
|
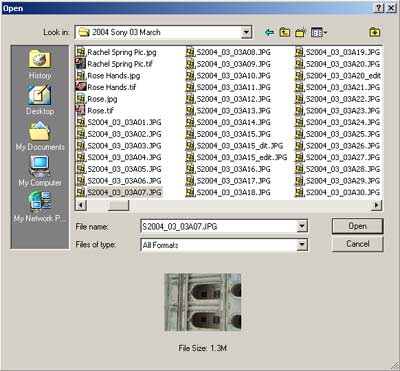
Add Photo Once the template is opened, you can now add your own photos either by drag and dropping or by copy and pasting! From the top menu choose File > Open, and the dialog below will open. Browse your system for a particular photo you would like to add. Once you have selected the photo, click Open.
|
|
|
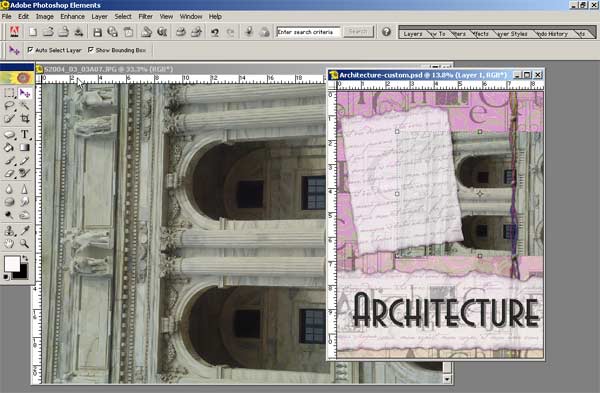
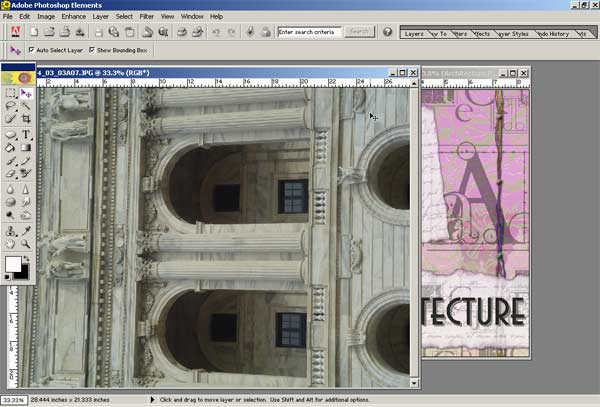
The photo and layout will now both be open in the working area of Photoshop Elements. |
|
|
Drag and Drop: Now, select the Move tool
on
the toolbar - top right button -
Copy and Paste: Make sure the photo is the active image. Choose Edit > Copy. Select the layout to make it the active image. Choose Edit > Paste to paste the copied photo into the layout.
|
 |
|
Close the photo by clicking on the X in the top name bar of the photo. OR, make it the active image and choose File > Close. Note: the photo is now on the layout, however, it is positioned below the photo mat and needs re-sizing and rotating. Click here to see the next tutorial in the series using Adobe Photoshop Elements: Rotating, Re-sizing, Adjusting Layer Position, and Moving Photos (or other elements).
Copyright 2004, CottageArts.net, LLC,
|
 .
Making sure the photo is the active image (click on the top bar of the
photo - it will become blue indicating it is the active image, as
shown above), click anywhere on the photo (but not on the blue bar!)
and drag it across to the layout. Release the mouse button and the
photo will paste into the layout.