
|
|

Rotating, Re-sizing, Moving, and Adjusting Layer Position:
Tutorial 2 in a series
of creating a custom layout
(Jasc® Paint Shop® Pro, Adobe® Photoshop®, Corel® PHOTO-PAINT,
Ulead PhotoImpact 7 and higher, and Microsoft® Picture It!® Digital Image
Pro would follow similar instructions)
|
This tutorial is the second in a series of small tutorials guiding you in creating a custom layout using the Simply Digital scrapbook templates, which are in PSD format. Here is a breakdown of the steps this series will cover:
Supplies needed: Adobe Photoshop Elements 2.0 Simply Digital Template CD (tutorial uses Simply Vacations CD) This tutorial continues right where "Tutorial 1: Adding Photos" left off, with the photo added to the template but in the wrong position (see image at right). We will now get the photo where we want, in the size we want.
|
|
|
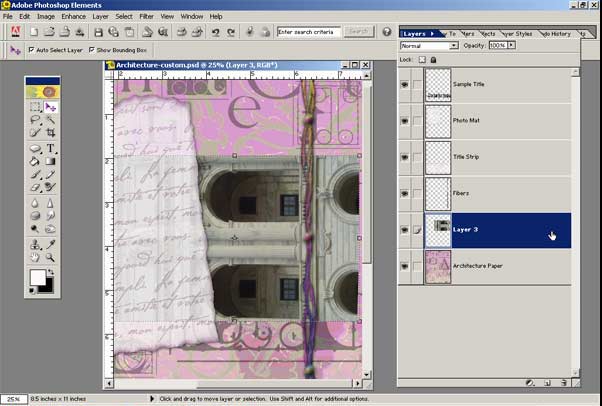
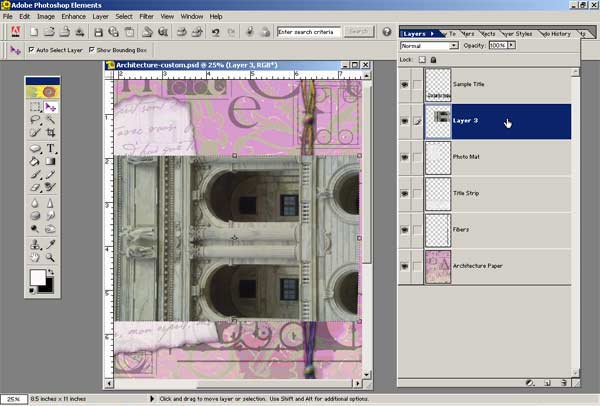
Adjust Layer Position The photo is positioned beneath the photo mat and we would like it above the photo mat. Simply click and drag the layer (named "Layer 3" by default when we dragged it into the layout) upward in the layer palette above the Photo Mat layer. You can now see that the photo is positioned on top of the photo mat but needs rotating. Note: this particular photo was taken in portrait mode and was saved that way when downloaded from the digital camera.
|
|
|
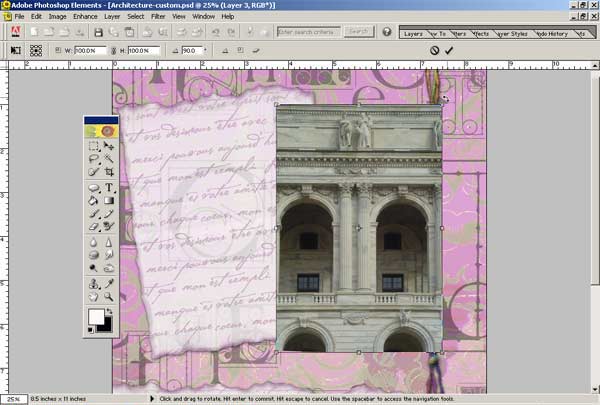
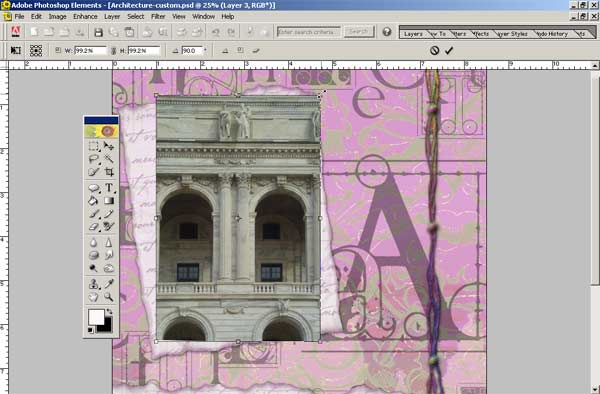
Rotate Photo Drag the mouse to one of the corners of the photo until you see the curved arrows, as shown. Turn photo in direction of desired rotation. Hold shift key at same time in order to rotate in exact 15 degree increments.
|
|
|
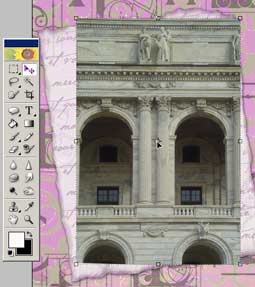
Move Photo Move the photo by dragging the mouse over the photo until you see the solid arrow in the center of the photo. Click and drag photo to desired position.
|
|
|
Re-size Photo The photo is a bit large for the photo mat. To re-size, move the mouse to one of the corners until the straight two arrow shape appears. Important: hold the shift key as you drag inward in order to maintain proportions and not distort photo. |
|
|
See the
next tutorial in the series
on adding drop shadows and photo
edges.
Copyright 2004, CottageArts.net, LLC,
|
