|
Since
the turn of the century digital scrapbooking popularity has exploded, even more so now
with the ease in which we have access to our digital photos via our cell
phones, tablets, and cameras. Most traditional scrapbookers are having fun creating word art and
journaling for their traditional pages with computer software, which is
really a form of digital scrapbooking. Some just take it a level further
and create their entire pages on the computer. It’s exciting when new
tools are introduced to help artists with their craft, but at the same
time, it can also be overwhelming.
Many scrapbookers are
digital photographers and are storing photographs on computer hard drives
instead of photo albums and boxes. Being able to use photos archived on
your computer is one of the main reasons digital scrapbooking is
increasing in popularity so rapidly.
If you’re a digital
photographer and need to do any type of photo editing tasks, you most
likely already own one of the fabulous image editing packages on the
market, such as Adobe® Photoshop® or Photoshop® Elements, Corel Paint Shop
Pro®, Creative Memories Storybook Creator, and Mac-friendly Pixelamator, just to name a
few. They all have incredible photo editing features, but did you know you
can also create entire scrapbook layouts from scratch using these tools?
Most offer a free download trial of their software.
Your Photos - Your Style
In creating a digital layout from scratch, there are the same basic steps:
design background paper, add photos, create photo mats or accent papers,
add effects such as drop shadowing, create embellishments (if desired),
and finish with titles and journaling. It’s up to you how you use those
steps to define your own unique style. Some like clean graphic lines
giving the look of a magazine ad, while others like the look of
traditional paper-pieced layouts, with “paper”, embellishments, and the
illusion of three-dimensions. The beauty of digital is so many
techniques are at your disposal to give such varied looks, which I'll
demonstrate below.
This article is just a
general overview of what's involved in creating a digital layout, so you can see the possibilities of
scrapbooking the digital way. For detailed step-by-step instructions
with specific software, see our other tutorials.
Equipment/Software needed for Digital Scrapbooking
·
Computer with at least 1 MB RAM; Mac or Windows operating
system.
·
Digital Imaging Software that supports layers, such as
Corel
PaintShop Pro or Adobe Photoshop/ Photoshop Elements
·
Photos available on your computer system, either by scanning
or by importing digital photographs
·
Optional: Designer quality Simply Digital™ Download Paks (see
ordering/download tutorial
here)
·
Optional: Photo quality printer and photo paper, if you want to print your
layouts at home (see our tutorial on
printing layouts for more
options)
Three Digital Collage Methods
We'll first take a look at three different methods of creating
digital pages/collages.
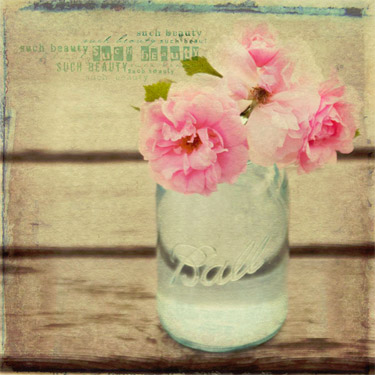
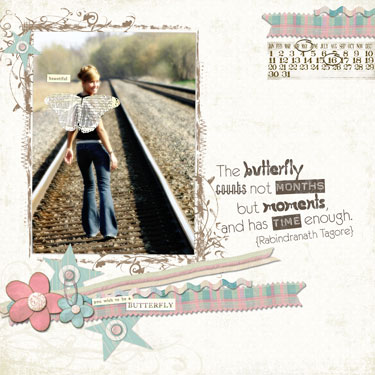
1. Photo Blend/Collage
Showcase a favorite photo by turning it into a work of art. Here we simply
added a digital paper on top of the photo, blended it with the background
using layer blend modes, added a decorative photo edge and word art. It's
quick and fairy easy to master this technique and it really adds dimension
and texture to your photo.

Supplies:
Adobe Photoshop or Photoshop
Elements
Freebie Scrap.Edge from past
newsletter
Naturals
7 Paper Pak
(to add texture)
Scrap.Words
- Inspiration (nature quote)
Our popular
Photo Art Blends are
also amazing digital tools to assist you in creating beautiful art out of
your favorite images. By experimenting with your image editor's layer
blend modes, they add color and texture, many with photo transfer-like
edges...giving your images that wow factor. Tutorials and sample recipes
are included with each of our varied sets.
Supplies:
Adobe Photoshop or Photoshop
Elements
Nature's Sketchbook Photo Art
Blends 3
Say it Again 3 Scrap.Words
And, see our blog series on printing your digital
artwork
here.
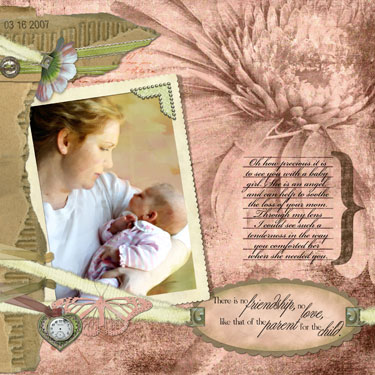
2. Page in an Instant
Using a pre-made Quick Page (we call them ScrapOvers) or fully-layered
Photoshop template (we call them
Scrap.Templates) is a great way to begin learning digital scrapbooking without the
time-consuming task of making all the individual elements or knowing how
to design a layout. With a ScrapOver, simply add your photos and journaling for instant beautiful pages. All
of the papers,
torn edges, mats, and embellishments are already there!
Here's a
tutorial on how to use them. With Scrap.Templates you get to pick the
papers you'd like to paste into all of the solid paper and shape layers,
and all of the embellishments included can be moved around, duplicated, or
deleted. Quick Pages are the quickest and Scrap.Templates offer the most
flexibility of the two options. Both are a blast!
Supplies:
Adobe Photoshop or Photoshop
Elements
Miracle of Birth Album Pak
(ScrapOver Quick Page)
Miracle of Birth Pak
(date stamp, star)
Butterfly Wings Pak
(quote, word stickers)
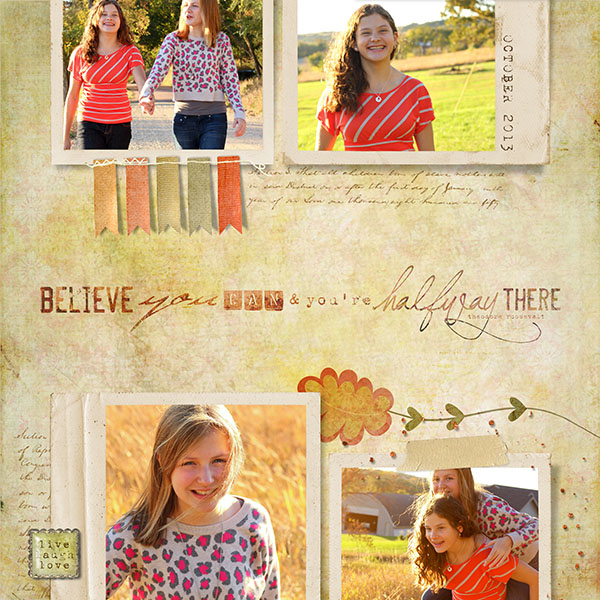
3. Build it Yourself
Once you're ready to start designing your own pages, our Simply Digital™ Downloads
have designer art (background papers, embellishments, word art, and
AlphaSets, templates), which offer you endless creative opportunities.
Here's
a tutorial on how to use them.
Supplies:
Adobe Photoshop or Photoshop
Elements
Corel Painter X (to convert photo to painting)
Growth Spurts Element Pak
download (flower/ribbon, brad, cardboard)
Flourish Fabrications Element Pak
download (journaling stamp)
Gentle
Love Page Pak (Daisy Paper, mat, watch face, photo corner, ribbon, heart
charm)
The Makings of a Digital Layout
The following is an
outline of the steps needed to create a basic digital layout from
scratch. The steps defined below describe each process, but don’t show
specific keystrokes, as this tutorial isn’t software specific.
-
Create a New
Image/File
-
Add Photos
-
Add Background Paper to complement photos
-
Add Photo Mats or Frames
-
Add Titles and Journaling
-
Add Drop Shadowing
-
Add Ready-made Embellishments, if desired
Create a New Image (Blank Canvas):
· To
begin we need a blank canvas, right? So, determine the size of the layout
you would like, such as 12” x 12” or 8.5” x 11”, or whatever suits your
tastes or albums.
· My
favorite is 12” x 12”, as I can then print it at this size, or 8” x 8” or
6” x 6” for the fun new mini-albums available.
· Let’s
create an 8” x 8” layout to be able to print on a standard printer.
180-225 dpi is a good resolution for inkjet printers; 300 dpi is
professional quality.
· Enter
the settings in your software’s new image dialog box, including a white
background, then press OK.
·
At this point, and frequently throughout the design process,
save your layout in your program’s native format so all the layers remain
intact and you can go back and make changes to individual layers whenever
you wish. Choose File > Save As and then save in your package’s
native format to keep all the different layers intact.
Add Photos:
·
Since the photos determine the color scheme of the layout, I
add these before selecting paper and mat colors.
·
To add a photo to a layout, browse your file system, and
find your photos.
·
Click and drag photos into the layout or use the edit/copy
and edit/paste commands to paste them into your new layout.
·
Now, move the photos to desired position. You may end up
moving them to different positions later, but that’s one of the wonders of
digital. Nothing is glued down!
·
Resize photos if necessary.
Create Background OR Add Designer Paper:
·
Now that the photos are added, we can pick complementary
colors for the papers using your software’s color picker tool.
·
Use your software’s paint bucket tool in your color of
choice to fill in the background, then use effects or paint brush tools to
design your background.
·
Add some effects, such as texture, or use the paintbrush
tool to design your own, and just like that you have a gorgeous background
to set off your memories.
·
OR, add one of our thousands of designer digital
papers available. These are often sold in Paper Paks or as part of a whole
digital kit, Page Pak.
Add Photo Mats or Frames:
·
In scrapbooking, it’s a good design idea to have
coordinating photo mats to complement the background paper.
·
Use your photo editor’s rectangular shape tool in a color of
your choice and draw a rectangular photo mat (or use whatever shape you
desire).
· OR,
select a digital Page Pak or Element Pak of choice and choose mats and
frames of choice.
Add Titles and Journaling:
·
My personal preference is to wait until the end of the
design process to add the titles and journaling, as I’ve had time to work
with the photos and see what story I want to tell or what feelings I to
share.
·
Using your text tool, pick the text color, font, and font
size. Then click the mouse on the page where your text should be placed
and type away. Play with different text sizes, effects, bevels, etc to
give your text dimension. You can even warp text to make it wavy.
Congratulations! You
have created a digital layout from scratch! You might be satisfied and
want to leave it as is, which is great. But, read on if you’d like to
jazz it up a bit.
Don’t forget to save your work again!
Apply Drop Shadows:
·
My favorite way to enhance a digital layout to make it look
more realistic is to add drop shadowing. It’s amazing the illusion of
depth created with just the click of a button (well, maybe three clicks).
·
Most digital imaging packages have drop shadow capabilities
under their Effects or Layer Styles functions. Check your package’s HELP
for more information. I prefer a small, faint, drop down right shadow for
realism.
·
OR, see our
Realistic Drop Shadow tutorial for
step-by-step instructions using Adobe Photoshop or Photoshop Elements.
Add Ready-made Embellishments:
·
For a punch of detail and splash of
color, you can add some fun ready-made embellishments from our
shop, which can easily be dragged onto your layouts. You can even change their colors to perfectly complement
your photos or style.
·
While your layout is open, choose
File > Open and
browse your hard-drive or CD drive for which embellishment(s) you’d like to add, open them, and then
drag them onto your layout. You can change their rotation,
color, and size, if desired. You can even duplicate them if you want more
than one. See our other tutorials for more information on how to do this.
Save File for Printing and/or Web Display:
· Save final image to same filename as in beginning of
tutorial. You can print directly from this file for high resolution.
· If burning to a CD to take to print at a professional copy
center, save as a full-size .pdf or .jpg format file.
· For posting to Internet sites or e-mailing to family and
friends, also save to different name at 72 dpi, 500-600 pixels wide, .jpg
format, keeping file size around 100 KB.
Well, that's just a
little bit about this wonderful art form so many are embracing. See our other
tutorials for more detailed instructions. Get to know your photo editor's
functions by reading the help guide, as well as searching the Internet for
fabulous websites and forums.
Michelle Shefveland
|